
Do you want to create a paid membership website with WordPress?
Creating a membership site with WordPress is easy. You can create a membership website to sell an online course or access your premium content. It’s one of the easiest ways to make money from a blog and doesn’t require any technical knowledge.
In this article, I’ll show you how you can create a membership website with WordPress in less than 20 minutes.
The Wonderful Business of Paid Membership Websites
Creating a paid membership site is one of the easiest ways to monetize your audience. It’s how some of the biggest creators on the internet make money. Your membership site can be a course or just access to some of your best content.
Some of my favorite blogs hide their best content behind a paywall. This is how Shane Parrish’s Farnam Street blog makes money. They let you read some of their content for free but charge a monthly fee if you want access to their best content:

They offer two different plans: $20 a month or $120 a year.
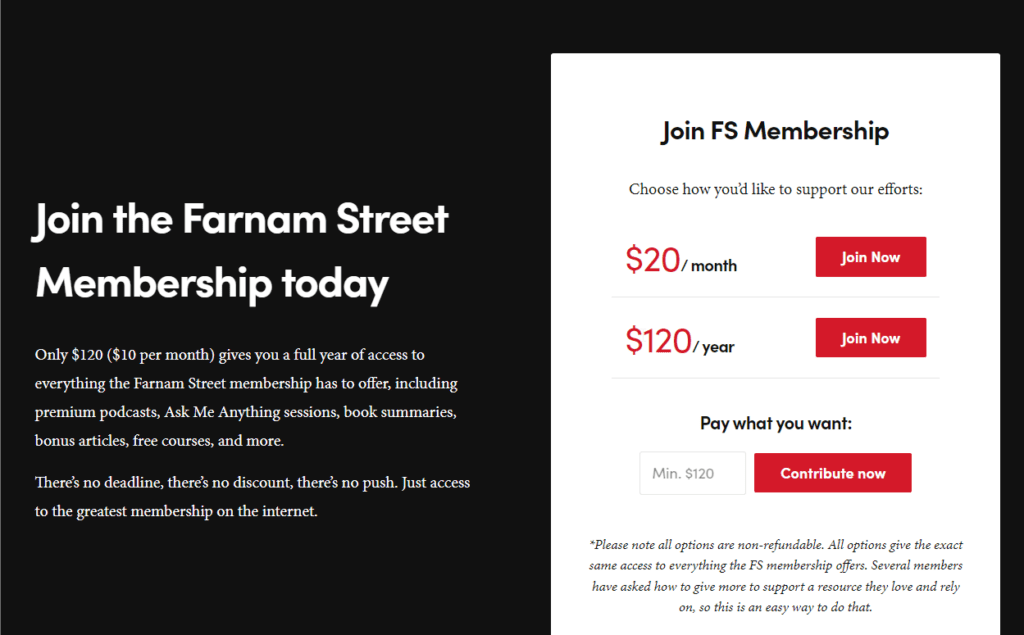
This subscription doesn’t just give you access to their premium content, it also gives you access to lots of other benefits:
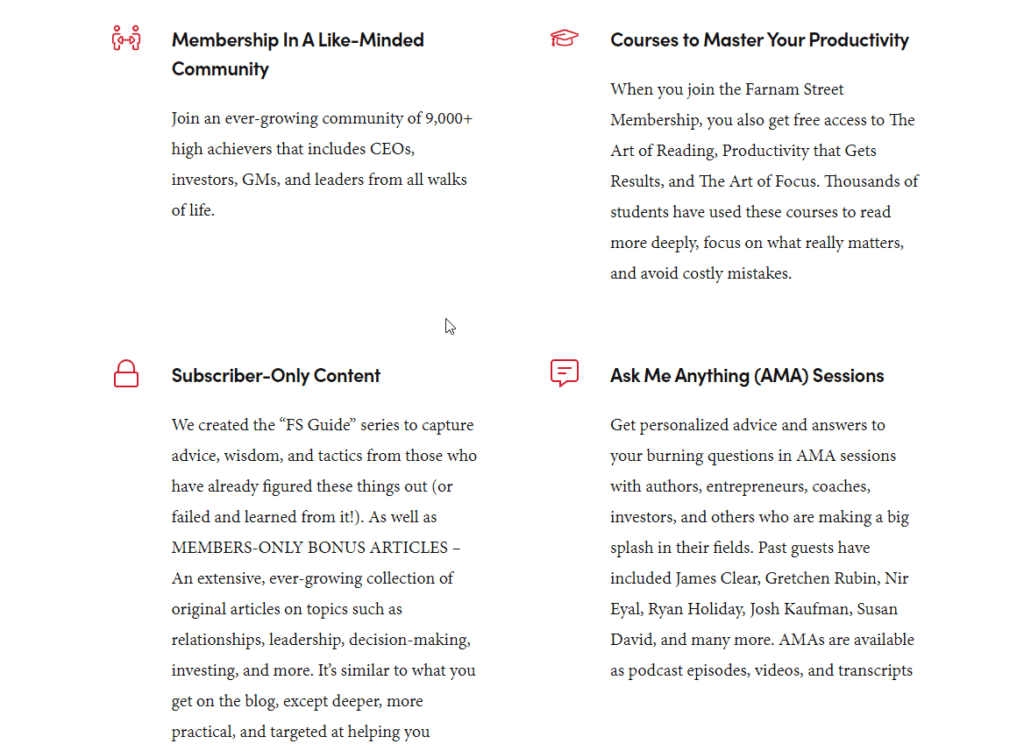
They can charge $120 a year because of how much value the subscription offers. It even offers access to a community where you can connect with other members.
Your membership site doesn’t need to have too much content to offer. When Farnam Street started its membership, it only included access to its subscriber-only content. They added all these other features over time.
Many full-time content creators rely on platforms like Patreon to make money. Patreon allows you to create monthly subscriptions that give your audience access to your paid content. This is what comedian Tim Dillon does. He uploads some of his content for free on YouTube. If you want access to his bonus episodes, you’ll need to subscribe to his Patreon site:
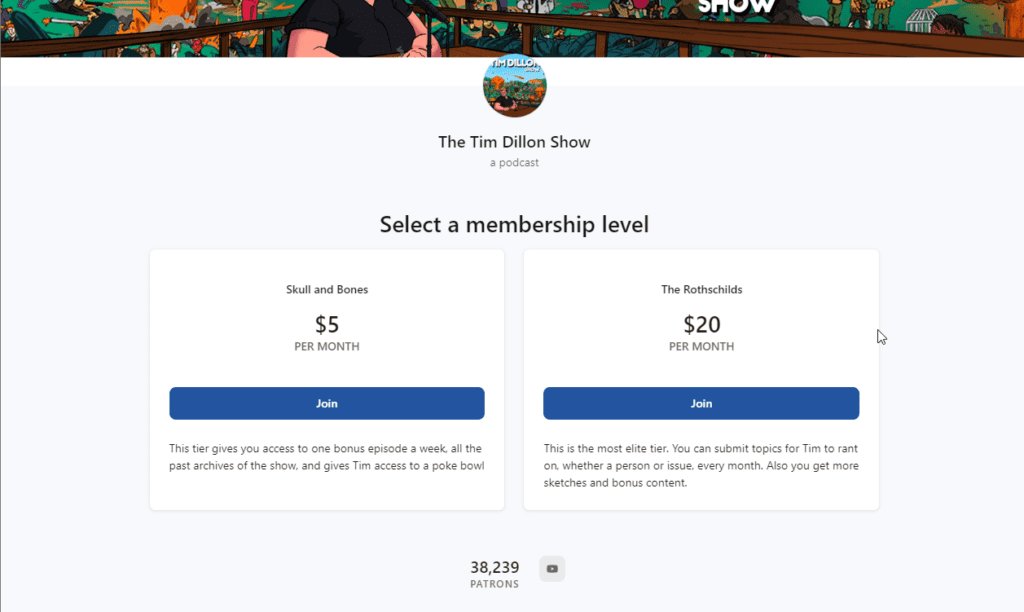
Although platforms like Patreon make it easy to set up shop, they also take a hefty cut. Patreon takes up to 12% of your monthly income. Guess how much you’d have to pay if you created a membership site with WordPress? Nothing!
To create a membership site with WordPress, you’ll need ProfilePress. It’s an all-in-one plugin for creating membership sites and selling digital products. It’s built from the ground up for beginners. Creating a membership site with ProfilePress only takes a couple of minutes and doesn’t require any technical know-how.
So, what are you waiting for? Download ProfilePress right now, and follow the instructions below.
How To Create Your Paid Membership Plans
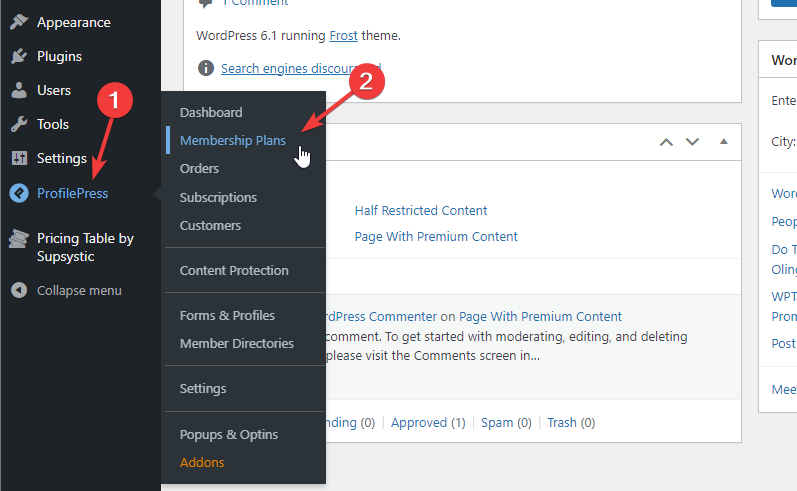
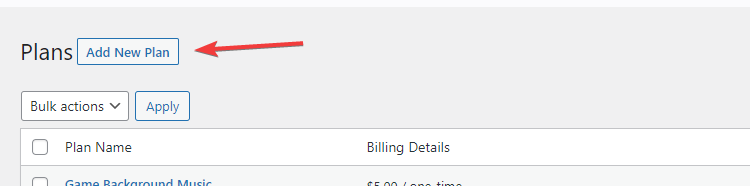
First, navigate to the Membership Plans section under ProfilePress:
Click the Add New Plan button:
You’ll now see the Add Plan page:
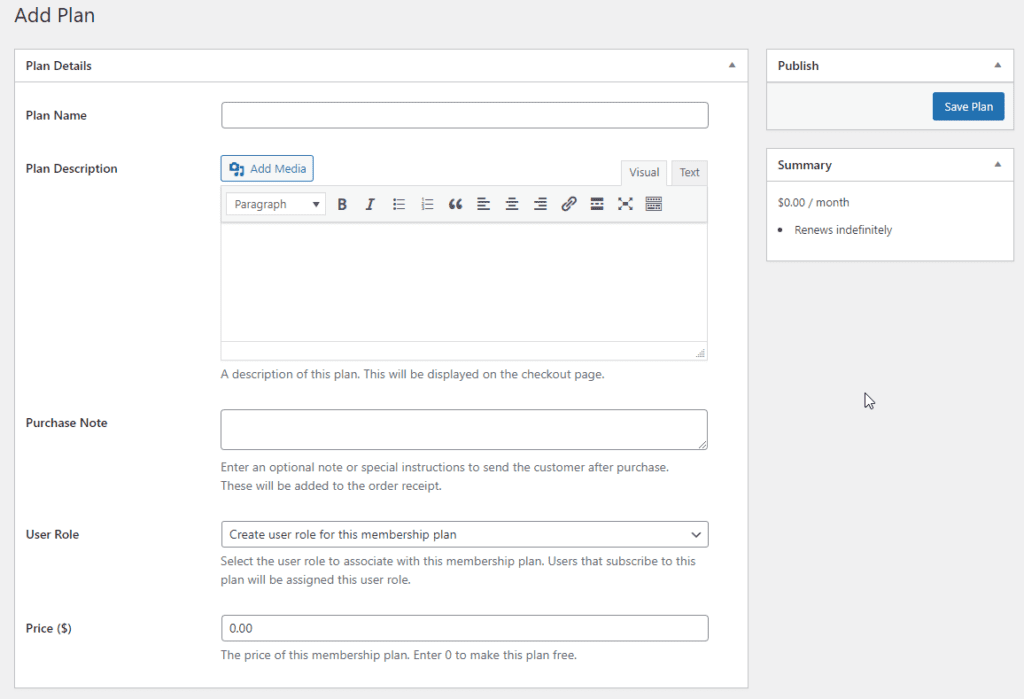
In the first section, here are the details you need to fill out:
- Plan Name: The name of this plan. If you’re creating a monthly plan, you might call this a ‘Monthly Plan’.
- Plan Description: Describe what your customers will receive when they purchase this plan. This description will be displayed on the checkout page.
- Purchase Note: Want to give your customers any instructions? You can write them here. This note will be emailed to your new customers along with the order receipt.
- User Role: This field allows you to select an existing User Role that you might want to add to any customer who purchases this plan. This is helpful if you have more than one plan that offers the same features. You can leave this field alone for now.
- Price: This is the amount that your customer will be charged. In the next section, you’ll pick how often your customers are charged. For example, if you decide monthly as the billing frequency, your customers will be charged this monthly amount.
Once you are done with the Plan Details section, scroll down to the Subscription Settings section:
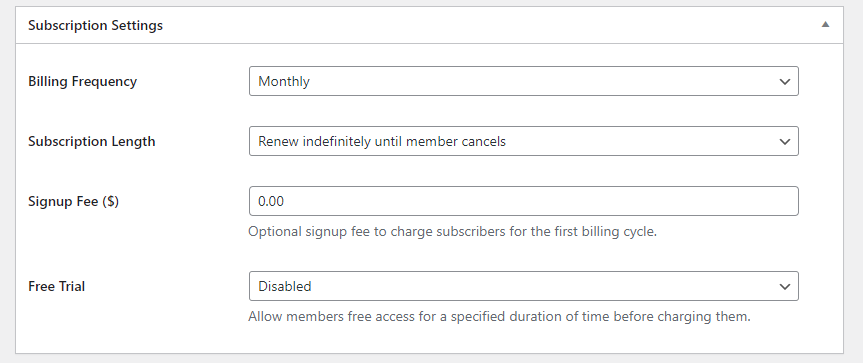
The first field, Billing Frequency, is how often your customers will get charged. If you want to create a one-time plan, select the “one-time purchase” option from the drop-down.
Next, Subscription Length is how many times you’d like to charge your customers. Leave this alone if you want to charge your customers until they cancel their subscriptions. You can also choose a fixed number of payments from the drop-down.
The Sign-Up fee field allows you to charge an additional one-time fee. This fee will be charged when a user first subscribes to this plan. For example, if your plan is $5 a month and you enter $10 as a sign-up fee, your customer will be charged $15 for the first month when they sign up.
The last field allows you to offer a free trial period to your customers. You can select trial length from the drop-down menu. Your customers won’t be charged anything until the free trial period is over.
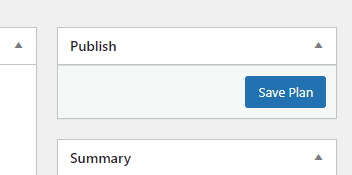
Once you are done with these settings, scroll back to the top and click the Save Plan button:
If you want to create an annual plan, follow the above instructions to create another plan, and select the Annual option in the billing frequency drop-down.
The Checkout Page
Once you create a new plan, ProfilePress generates a checkout link for that plan. You can find the link to this checkout page from the Membership Plans section of ProfilePress:
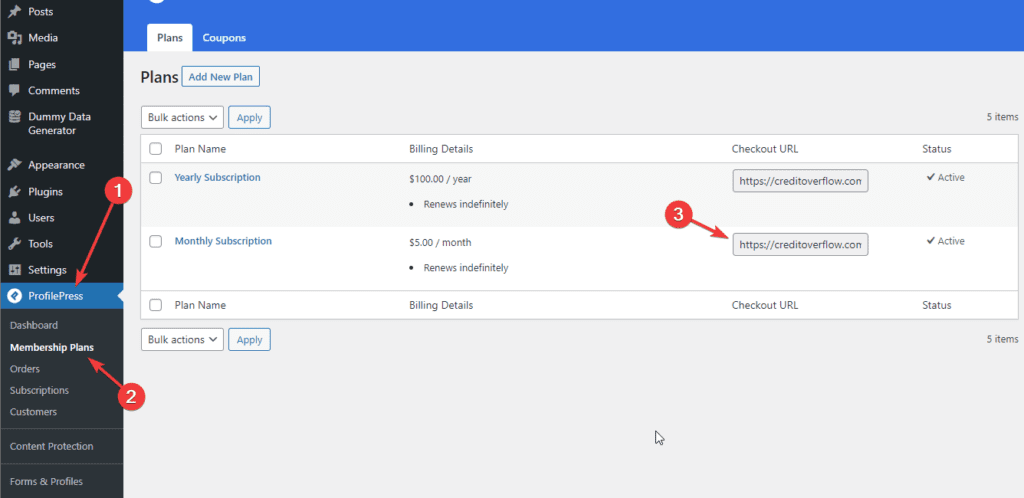
If you want to see what the checkout page looks like, copy the checkout link and open it in your browser.
If you’re wondering, this is what your checkout page would probably look like:
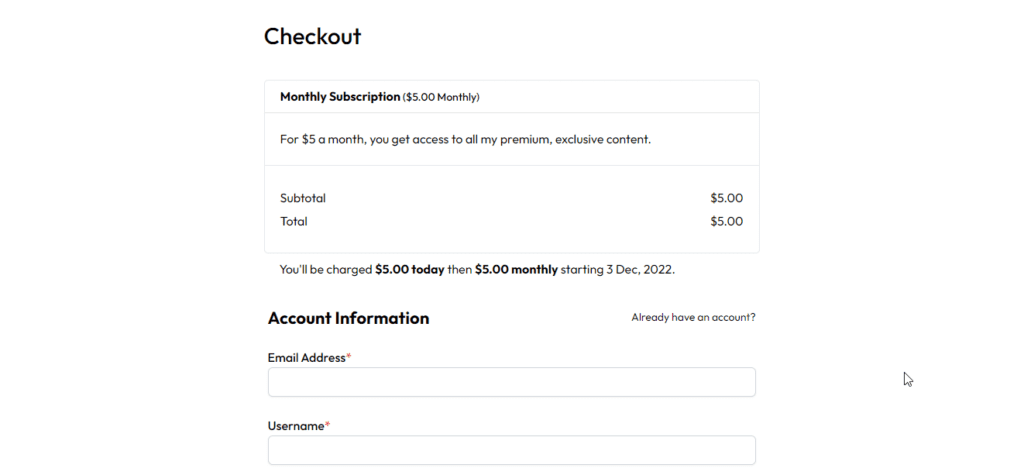
Send your visitors this link to allow them to buy this plan.
Connect a Payment Gateway
To start accepting payments on your website with ProfilePress, you’ll need to connect it to a payment gateway. ProfilePress works with Stripe, Mollie, and PayPal.
Note: If you just want to see how ProfilePress works, skip this step and move on to the next section. You can return to this step when you’re ready to accept payments.
If you don’t already have an account with any of these services, I recommend signing up with Stripe. It’s the easiest and the quickest of all options.
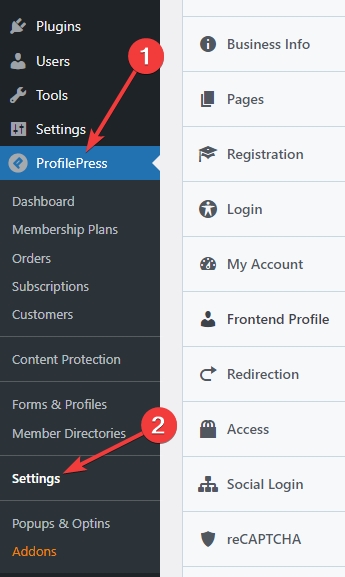
Once you create your Stripe account, log into your WordPress dashboard and navigate to the Settings section under ProfilePress from the sidebar:
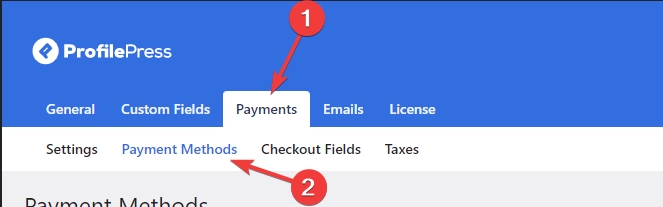
Now, select the Payments tab and then the Payment Methods tab under it:
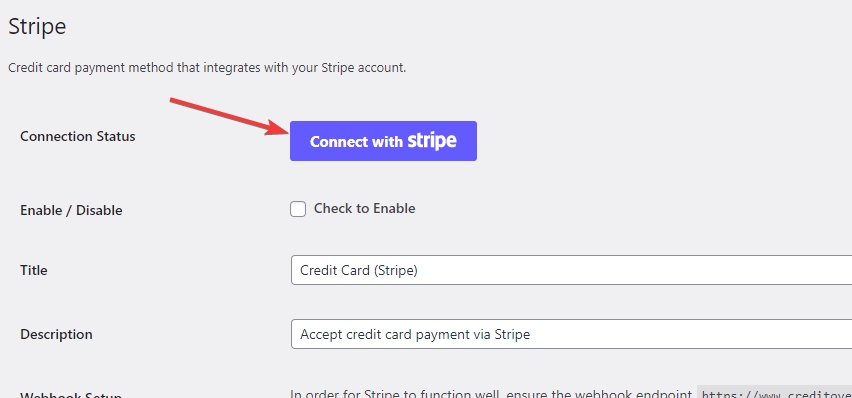
Click the Configure button next to Stripe:

Now, click the giant, blue Connect with Stripe button:
This will take you to Stripe’s login page:
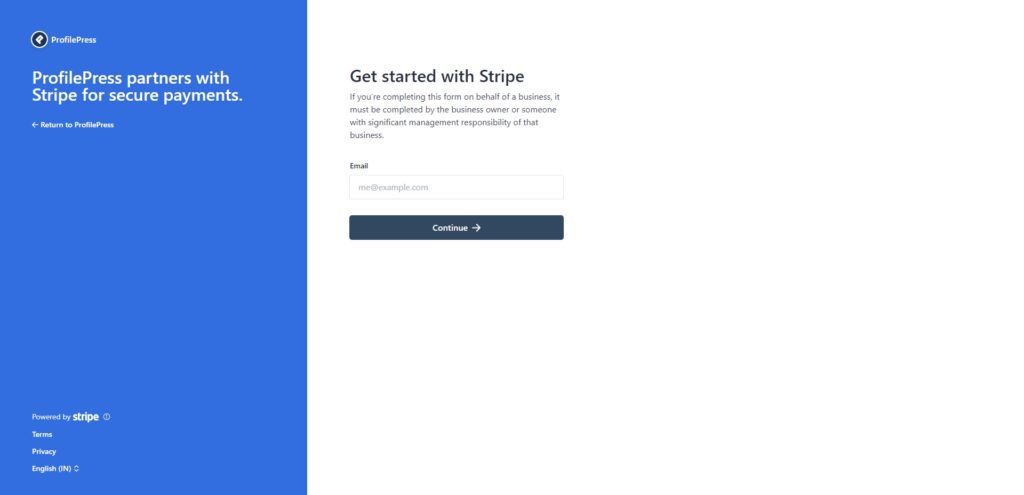
Log into your account, and select the payments account you want to connect with ProfilePress:
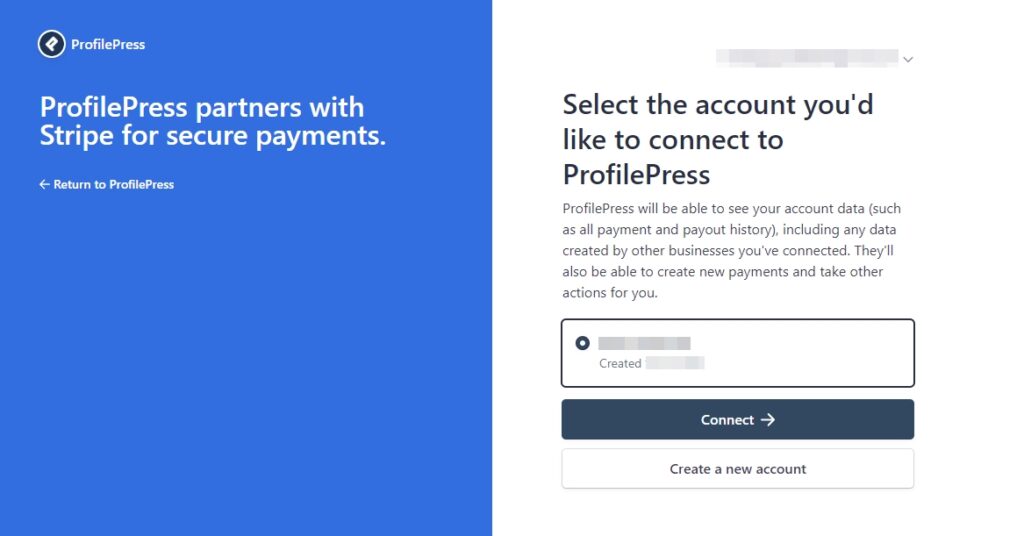
Most likely, you’ll only see one account, which will be already selected. Just click the Connect button if you only see one account.
This will take you back to ProfilePress’s Stripe Configuration page.
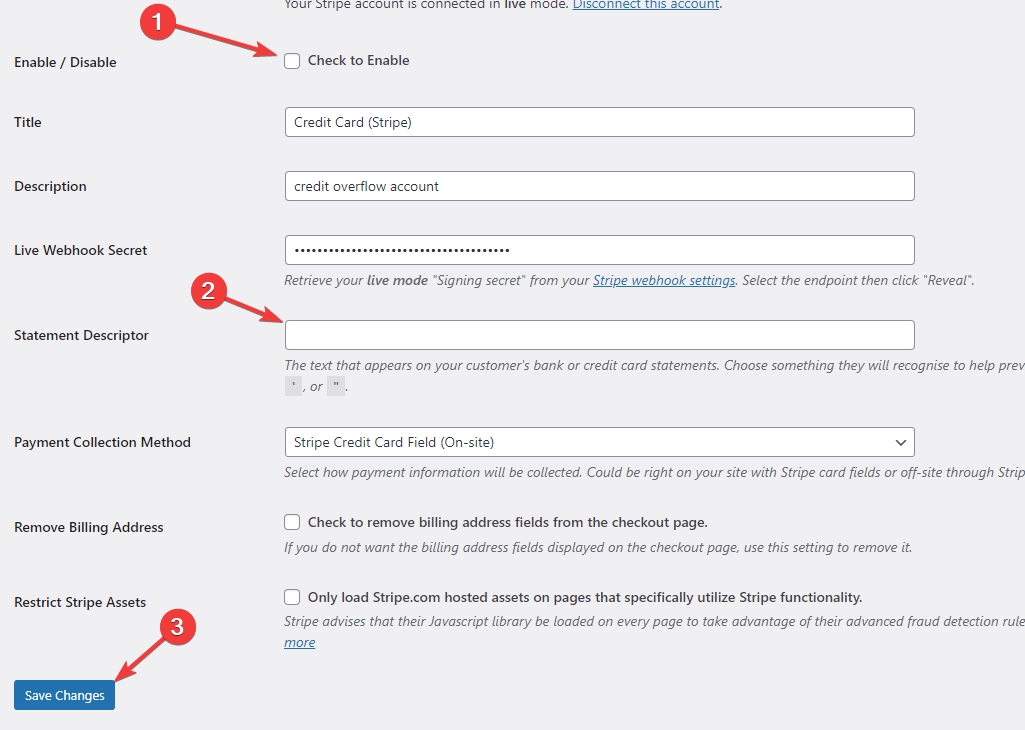
First, click the Enable checkbox on top. Then, enter your business name as the statement descriptor. This is the name your customers will see on their credit card bills. Finally, click the Save Changes button:
That’s it! Now your website can accept payments via Stripe.
If you want to use PayPal instead, follow the instructions on this page. The process is just as easy and only takes a minute. If you wish to use Mollie, follow the instructions on this page.
How To Restrict Access To Your Content
Now that you have created your first membership plan, you’ll want to restrict access to your content to only those with an active subscription. ProfilePress offers many ways to do this. Here are two of the easiest:
How To Restrict Access To Parts of Your Content
If you want to restrict only parts of a page’s content, the easiest way is to use the Conditional Blocks plugin. But first, install the Conditional Blocks plugin. It comes with built-in integration with ProfilePress.
Once you have installed the Conditional Blocks plugin, open the post/page you want to restrict access to in the Block Editor:
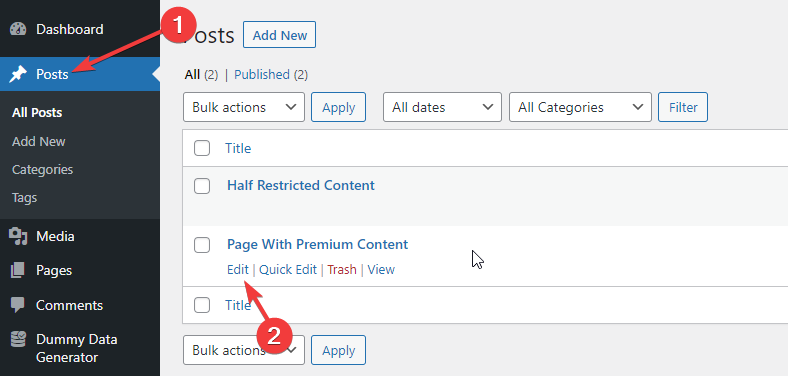
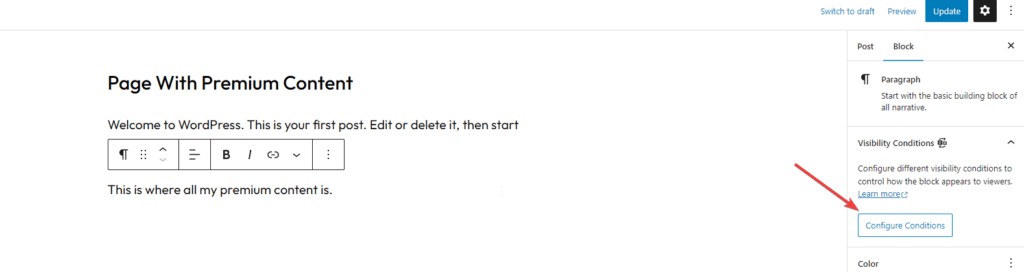
Click on the block that you want to restrict access to. Now click the Configure Conditions button in the right sidebar:
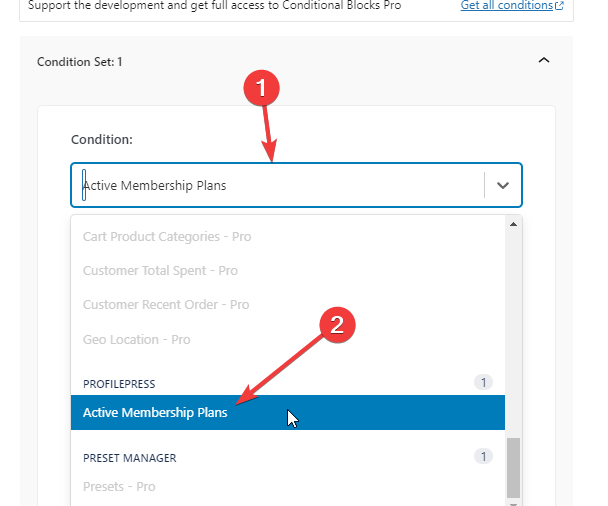
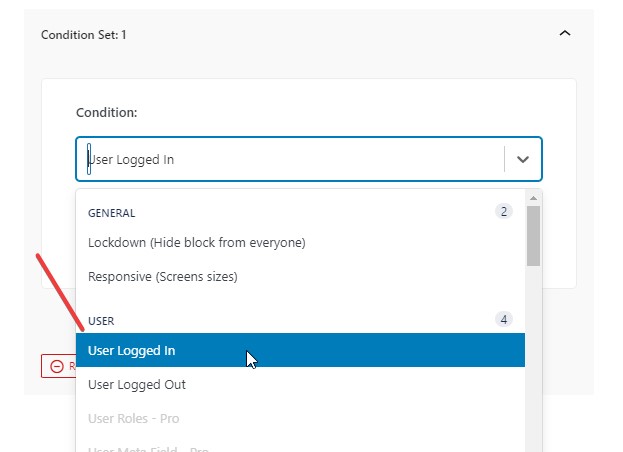
This will let you select conditions when this block’s content is visible. First, click the condition drop-down menu and select Active Membership Plans:
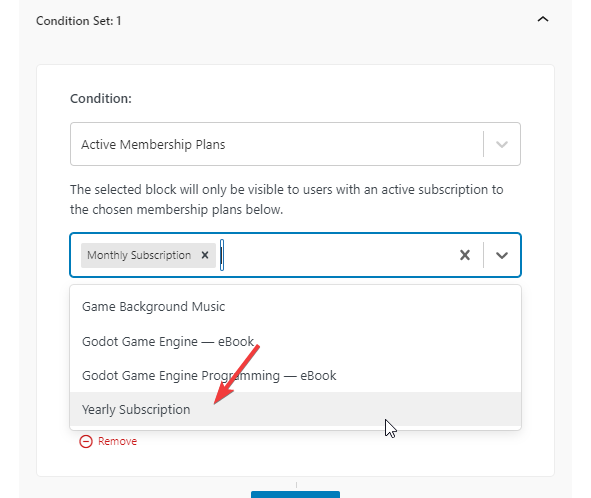
In the second drop-down menu, select all the plans that should allow access to this block’s content:
Conditional Blocks offers a lot of flexibility when it comes to restricting content. Restricting access to content based on active membership plans is only one of the available conditions. There are over a dozen different conditions you can choose from.
If you only want to display this block to users when they are logged in, you can select that as the condition:
You can also make complex conditions by using AND/OR logic. Click the AND or OR button at the bottom and select a secondary condition. For example, you could display content to users who are logged in and have an active membership plan:
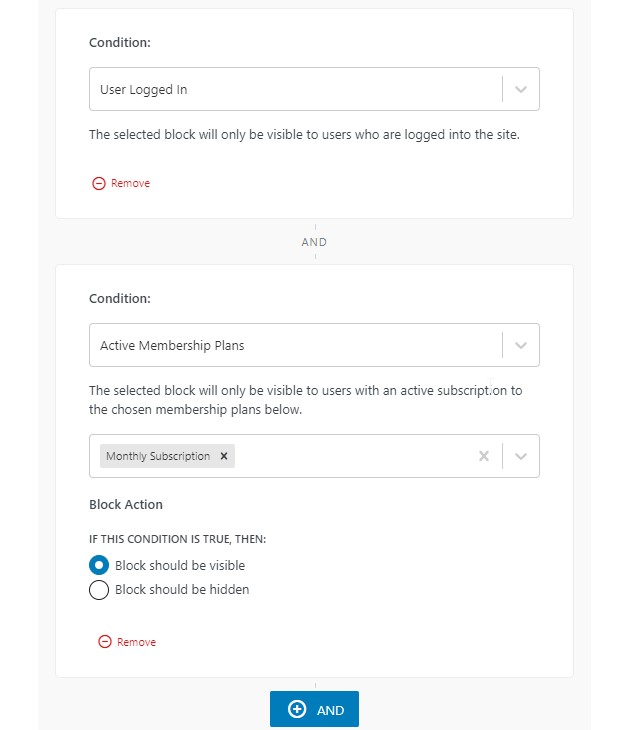
You can add as many conditions as you would like. You can display blocks based on User Role, User Meta Field Value, Screen Size, Cookies, Query String, PHP Login, WooCommerce Cart Value, and more. Conditional Blocks is the only plugin you’ll need to restrict access to your WordPress content.
Once you’re done selecting the conditions for restricting the block’s visibility, click the close button on top of the popup to save your changes.
Apply the same settings to all the blocks you want to hide from your users who don’t have an active paid subscription.
How To Restrict Access To Entire Pages
Restricting access to parts of content is an excellent strategy. It lets you tease your visitors. You can display half your content and then ask them to sign up if they want to view the rest.
But what if you want to restrict access to a lot of pages? Or if you don’t want anyone to view these pages at all without an active subscription?
In that case, you can use ProfilePress’ built-in content protection features.
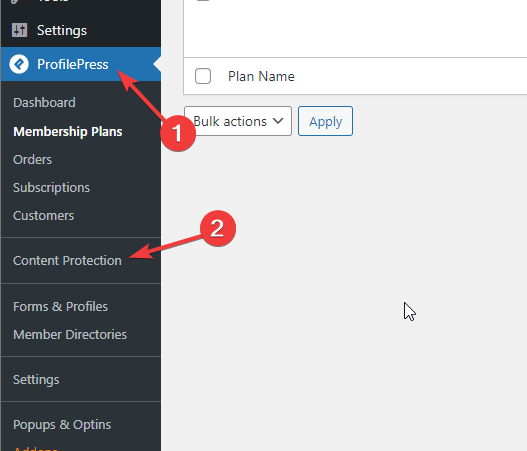
First, navigate to the Content Protection section under ProfilePress:
Click the Add a Protection Rule button on top. You’ll see this page:
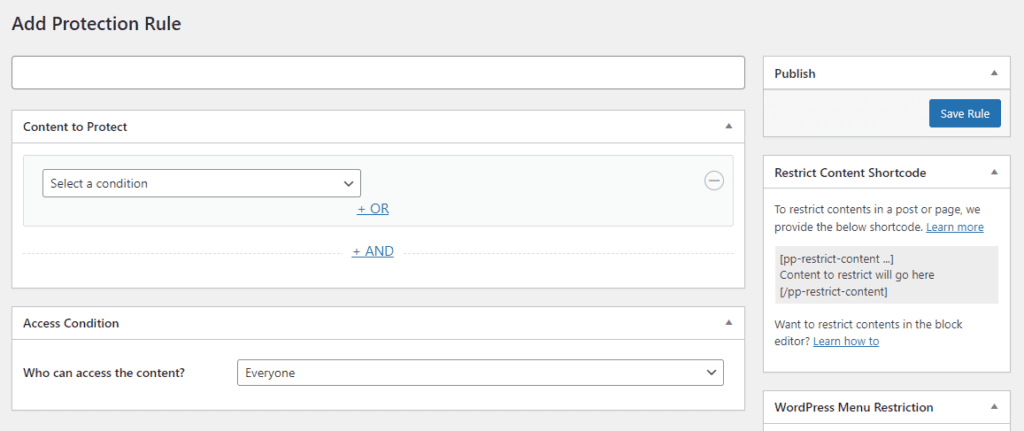
In the first section, you get to select the conditions for what pages you want to restrict access to. There are over a dozen different conditions you can choose from:
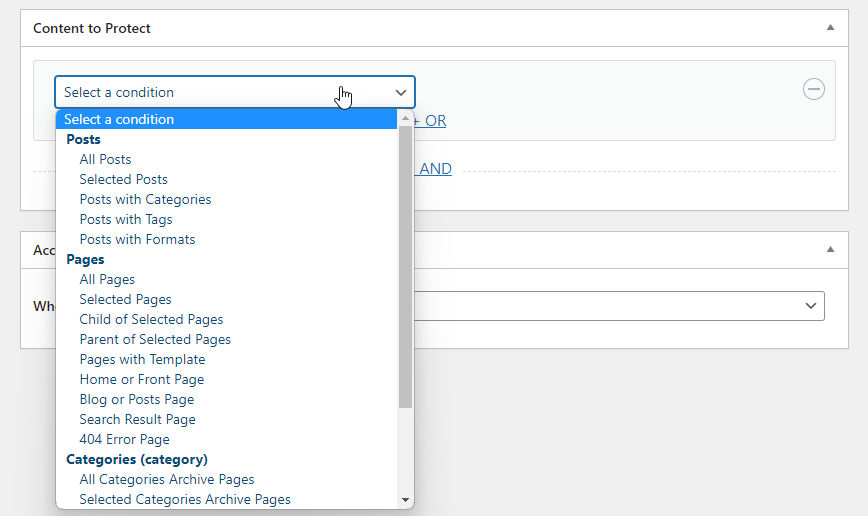
The easiest option is the Selected Posts condition. It lets you select posts that you want to restrict access to:
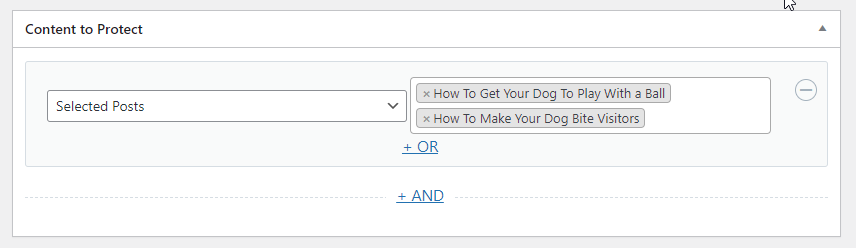
You can also select pages using the Selected Pages condition. Click the “+ AND” link to add another condition. You can add any number of conditions you want. You can even build complex logic based on the available conditions using basic AND/OR logic.
Once you’ve selected the pages you want to restrict access to, scroll down to the Access Condition section:

Select Logged In users from the drop-down menu. This will let you select the membership plans that you want to allow access to these pages:
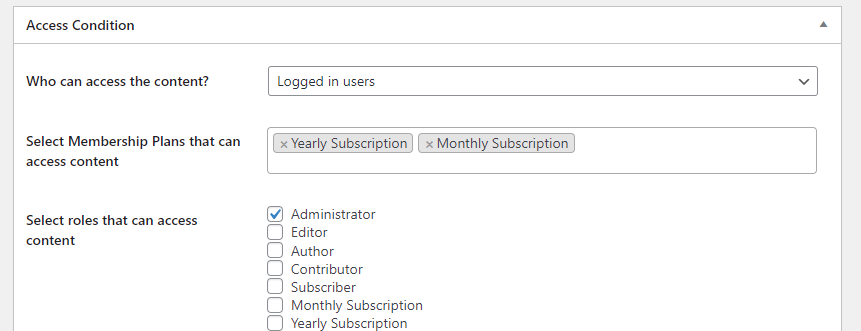
You can also select roles to give access to the restricted pages.
Finally, click the Save Rule button on the top right to save this content protection rule. Now, anyone who doesn’t have an active subscription won’t be able to view the contents of your selected posts and pages.
Conclusion
Creating a paid membership site gives you an easy way to monetize your content. It allows you to make a full-time living income while creating content for your audience. A paid membership site is also low-effort and doesn’t take months to set up.
Download and install ProfilePress to create the paid membership plans and Conditional Blocks to restrict content on your WordPress site. You can get up and running in less than 30 minutes!
