The WordPress Block Editor is a new and dynamic way of creating and editing content in WordPress. This new Block Editor replaced the Classic Editor, introducing various ways to build websites using content blocks. There are also a huge amount of available blocks like paragraph block, heading block, image block, and column blocks to name a few.
The “Block” concept is versatile since Blocks can be configured and paired together. This simply means that a fully functional WordPress site can be designed using the full integration of well-built content blocks.
At first, the WordPress Block Editor seemed complicated for the average user. The editor’s terms and mechanics were only clear to the official WordPress Team. But as the years went by, the WordPress Block Editor became truly known and popular among online communities.
Let’s take a look at the differences between the Classic Editor and WordPress Block Editor:
- WordPress Block Editor has advanced formatting options compared to Classic Editor’s limited options.
- Different elements can be added through WordPress blocks, granting flexibility in terms of content creation.
- The Classic Editor has noticeable lagging issues but WordPress Block Editor runs smoothly most of the time.
- Since the WordPress Block Editor has tons of variability, it can be more confusing to use than the Classic Editor.
- Adding multimedia files is a seamless experience with Block Editor. For example, you can drag and drop photos in the content block instead of uploading the file. This process can help you save time.
The WordPress Block Editor also offers a more flexible way to use and customize content blocks: advanced WordPress blocks.
In this article, you will learn about the essential types of advanced WordPress blocks. Additionally, you’ll know how to use the advanced blocks and standard blocks to speed up your workflow when creating WordPress sites.
How to Use Advanced WordPress Blocks?
Advanced WordPress blocks are somehow more complicated than simple WordPress blocks. Average users might feel overwhelmed with the extra steps needed to set up an advanced WordPress block. This is actually a misconception because all advanced blocks can be prepared easily, leaving out a big room for trial and error.
Group Blocks
It’s easy to add individual elements to your WordPress post or page. However, the process can be tedious if you need to replicate the same set of blocks over a couple of posts or pages. You can save time and effort by combining a series of individual blocks into Group Blocks.
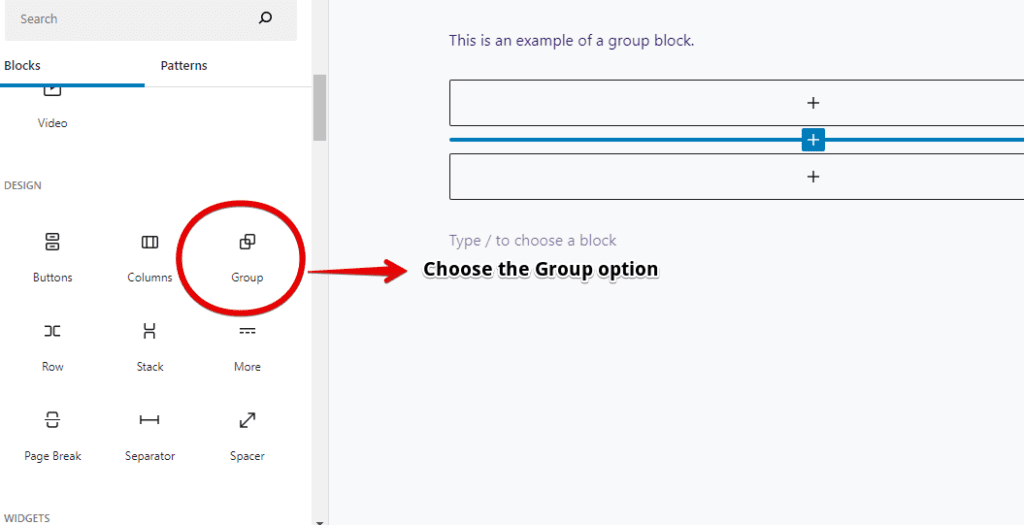
To add a group block, you must choose the post or page you want to work on. Now, go to a specific post section and add a new block. Choose the ‘Group’ option instead of the usual ‘Paragraph’ element.
Once you’ve selected the Group Block element, you will see multiple options for adding new blocks. The primary option allows you to add an element within the block set while the second option lets you add elements after the Group Block.
You’re free to add as many elements as you want within the Group Block. To manage these elements properly, you can always check out the List View option provided by WordPress in the main menu.
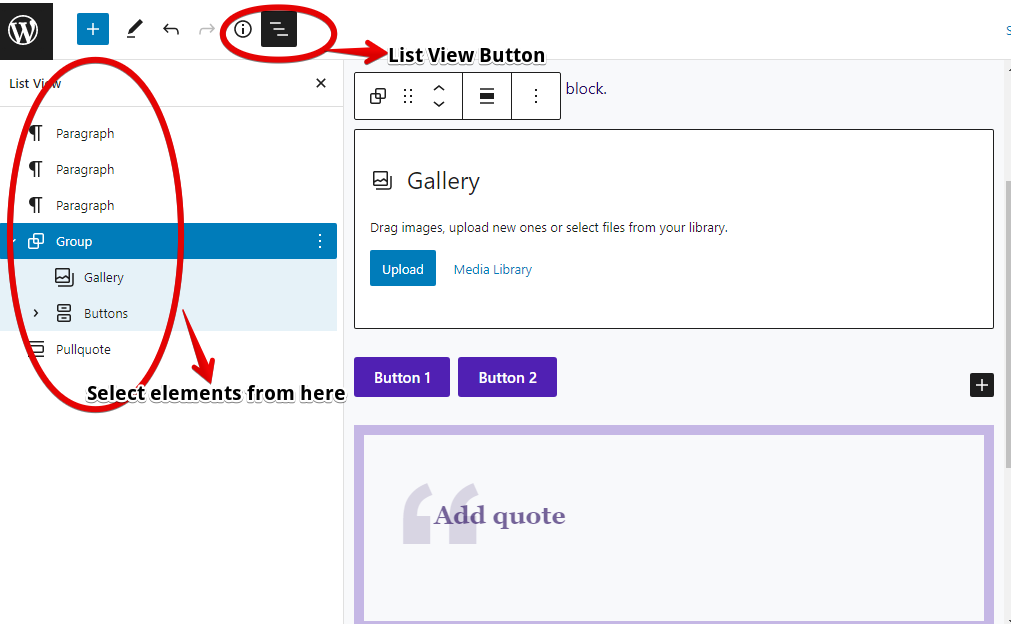
Alternatively, you can add all of the blocks in a group and just select them directly from the editor. This method is faster yet more advanced.
Formatting Options for Group Blocks
Each group block will likely contain multiple elements that can be customized. Understanding the formatting options for group blocks will allow you to control the flexible aspects of your content.
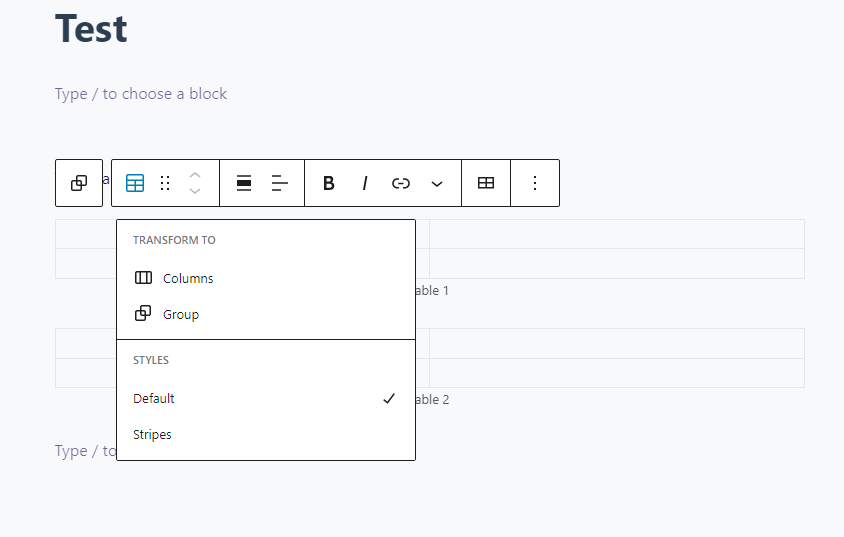
To view the entire formatting menu, you can just select the entire block. Once the block is selected, you will see four options to manage content elements:
- Block transformation to columns
- A handle button to drag and drop the block itself
- Block size adjustment
- Ungrouping the block or saving it as a reusable block
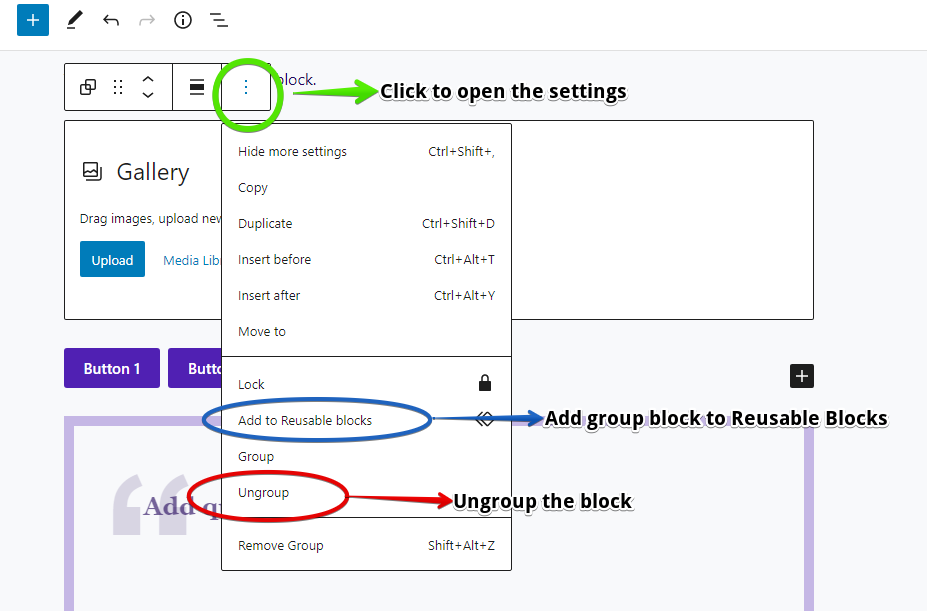
If you’re not satisfied with the placement of modules, you can always ungroup the block. The ungroup option will separate the block into individual elements, allowing you to redo the process or start a new block. Additionally, you can just add a unique block to reusable block options to use later for other posts or pages. Now that’s really convenient!
Reusable Blocks
Just like group blocks, the Reusable Block is one of the most useful features of WordPress. Basically, a reusable block is a block that can be built once and reused many times. Reusable blocks are great for making posts and pages that have recurring content like sales pages and posts with general information. You can also edit reusable blocks anytime.
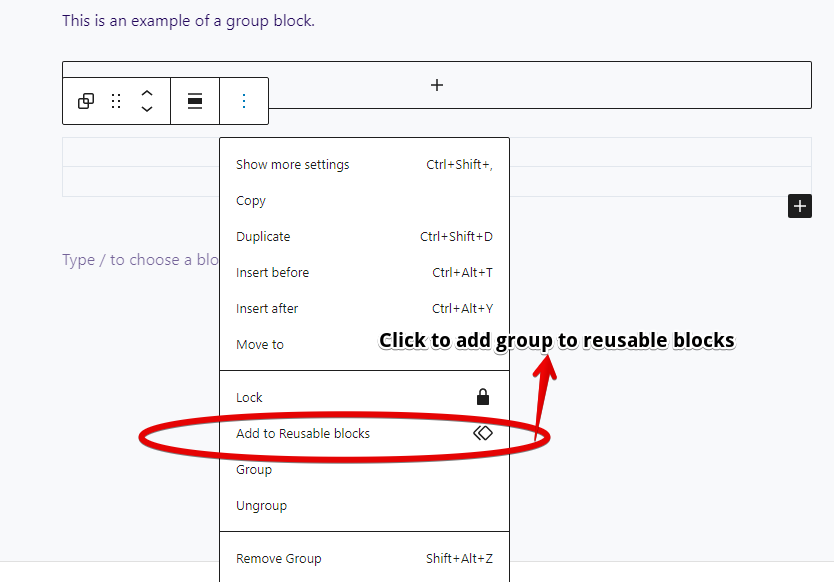
To create a reusable block, you must select a block that you’re currently working on. Afterwards, just click the drop-down button and choose the option: Add to Reusable Blocks.
For easier access, you can rename the reusable block any way you see fit. Just make sure that the name is distinct and separable from other reusable blocks that you intend to build.
Removing a block from reusable blocks is also easy. Simply choose the undesired block and select the Remove from Reusable Blocks option. This is the exact opposite of the process of adding reusable blocks.
Also, before editing a reusable block, keep in mind that the changes will occur for all instances of the said block. Adding an image, for example, will take place immediately and affect all related posts and pages.
Managing Reusable Blocks
Similar to the Posts section in the WordPress dashboard, the Block Editor has a list of all reusable blocks. You can check out this list by clicking the Manage All Reusable Blocks link. It’s also possible to edit any reusable block from the list directly.
The other options include JSON exporting and JSON importing. These options are easy and straightforward. For JSON exporting, you can just click the Export as JSON button. For JSON importing, you must find the JSON file on your computer and upload it like an attachment.
Importing and exporting reusable blocks are essential processes. Once the blocks are imported or exported as JSON, they can be considered as backups or distributable files. Such files are useful for constant sharing, distribution, or content management.
Block Patterns
Block patterns are some of the most beneficial yet underused features of the WordPress Block Editor. A block pattern is a pre-made layout or template that consists of multiple blocks. Instead of making blocks one by one, you can just load a block pattern easily.
A great advantage of block patterns is the fact that they can be reused and re-applied many times. This feature is similar to the capability of reusable blocks, except that an entire layout of blocks can be reused instantly.
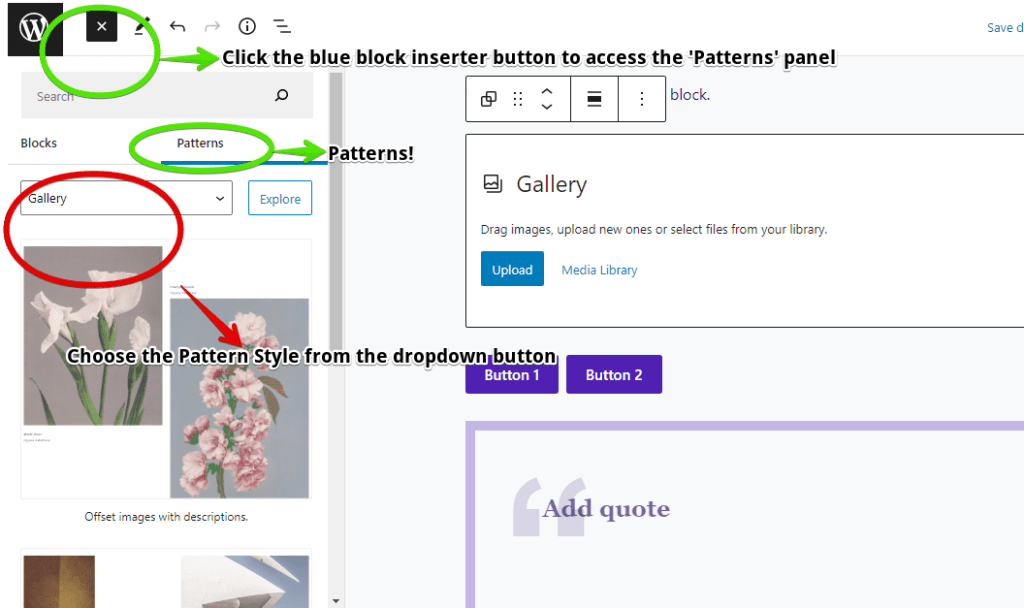
To get a pre-made block pattern, you can access the WordPress Block Patterns Library. This library contains numerous block patterns created by WordPress developers, designers, and users. The different types of patterns that you can get are gallery templates, headers, image sections, footnotes, and CTAs.
Some themes have pre-built patterns that are highly useful if you prefer Full Site Editing. There are also plugins that offer access to pre-built themes such as Extendify. The Extendify plugin has hundreds of WordPress patterns that can be embedded without lines of code.
Once you’ve chosen a block pattern, just click the Copy button. Instantly, the Editor will send a code to your computer’s clipboard. Afterwards, just paste the code into your WordPress post or page.
The Different Use Cases of Advanced WordPress Blocks
Now that you know the different types of advanced WordPress blocks, it’s time to understand their potential use cases. While the advanced blocks have overlapping use cases, they can still be adjusted based on your goals and preferences.
Group Blocks Use Cases
- Pricing tables
- Multimedia content sections
- Repeatable article templates
Reusable Blocks Use Cases
- Embeddable headers and footers
- Content creation efficiency
Block Patterns Use Cases
- Full deployable landing pages
- Direct response copy variations
- Complete stores and website galleries
- Multimedia carousel
Improving Your Content Versatility With Conditional Blocks
When it comes to improving the versatility of your site blocks, you can never go wrong with Conditional Blocks. In a nutshell, Conditional Blocks is a highly useful plugin that allows you to mix conditional logic with any WordPress Block mentioned above. These conditions can do many things related to content visibility, content management, and full block customization.
Conditional Blocks’ conditions can also be applied to grouped blocks, reusable blocks, and block patterns. Plus, the conditions will also work with the separated elements inside a chosen group block.
Take a look at some of Conditional Blocks’ functionalities:
- Easy-to-use plugin – no coding knowledge required
- Flexible content scheduling based on different variables
- Content visibility based on user roles, logged-in, and logged-out users
- Allows the seamless usage of natural upsell links
- Full content restriction for membership-type websites
- Easy integration with WooCommerce
- Time-saving customization of conditions through Preset Manager
- WordPress 6.0 compatible
Conditional Blocks has a Limited Free Version. In this version, you can try the plugin’s easiest and most popular conditions. It’s a no-commitment ride that will let you see the initial capabilities of Conditional Blocks. Once you’re ready, you can always switch to the plugin’s Pro version, unlocking 14+ conditions!
Conclusion
Advanced WordPress blocks can improve the way you build content for posts and pages. More importantly, advanced WordPress blocks will help you save precious time in terms of content creation.
So, what are you waiting for? Try to use some advanced WordPress blocks for your site and improve them further with Conditional Blocks!