If you have a diverse readership or create exclusive content for a particular type of user, you might want to show personalized content to different users in WordPress.
Traditionally, this is done by using a membership plugin to restrict access to exclusive content. However, if you don’t want to mess around with a complex membership plugin or add plugin bloat to your website, you can simply show exclusive content to users by configuring Gutenberg blocks.
The easiest way to do this is by using the Conditional Blocks plugin.
In this article, we’ll explain how you can show personalized content to different users in WordPress using the Conditional Blocks plugin.
Let’s put everything into context before we begin.
Why you might want to show personalized content to different users
Showing personalized content to different users means that readers only see content that is relevant or targeted to them. In other words, some types of users can see certain content while others can’t.
For example, let’s say you run a blog that teaches people how to start their own YouTube channel. You have regular people visiting your site as well as Members that have signed up for your membership program.
You can create content that’s exclusive for members and publish it directly on your WordPress site. This makes it easy for people to access and consume content.
Let’s quickly step through a few more examples of sites that may want to show personalized content to different users:
B2B customers and retail customers
If you sell to both B2B customers and retail customers, you might want to display different marketing messages on your site targeted at both types of customers. This way, when a B2B customer logs into their user account and views content on your site, they’re able to see deals, new products, and upcoming sales that are most relevant to them.
Similarly, when a retail customer logs into their account, they’ll see content that’s meant for them. In this way, you can show personalized content to differ users in WordPress.
Members
If you run a simple membership site, you can show personalized content to members without having to install a full-blown membership plugin.
Following our example from above, you can create pages for members-only that contain exclusive content such as checklists, in-depth guides, statistics, infographics, and worksheets and show them to members only.
When regular people visit your site, they won’t be able to access the members-only content. Instead, they’ll see a prompt that prompts them to sign up to become a member to gain access to the exclusive, personalized content.
Contestants
As an event organizer or business owner, if you run contests, you can show personalized content to different types of registrants.
For example, if you’re running a short story contest, you can show personalized content (such as eligibility criteria, prizes, and a registration form) to different types of users. In this case, you might want to create different categories for the contest based on the registrant’s age such as Kids, Young Adults, and Adults.
As long as you have multiple user roles on your WordPress site, you can easily show personalized content to different users.
How to show personalized content to different users
The easiest way to show personalized content to different users is by using the Conditional Blocks plugin for WordPress. Here, we’ll explain how you can do that in three easy steps.
For this tutorial, we’ll assume you have some content that you’d like to show to different users and at least one user role.
Step #1: Install the Conditional Blocks plugin
The first thing you need to do is get the Conditional Blocks plugin. Conditional Blocks lets you show any Gutenberg block to different users based on custom conditions. It’s the easiest way to show personalized content to different users in WordPress.
At the time of this writing, the Conditional Blocks plugin lets you set over 13 different condition types – with more to come.
To get started, install and activate the Conditional Blocks plugin on your WordPress website. Once that’s done, you’ll be prompted to enter the license key you received at the time of purchase.
Step #2: Add content to your page or post
Now that the Conditional Blocks plugin is activated on your WordPress site, you can go ahead and add content to a page or post. The Conditional Blocks plugin works with all default WordPress blocks in Gutenberg and most third-party blocks.
Simply create your page or post as you normally would using Gutenberg blocks and click the Save Draft button when you’re done. It might look something like this:
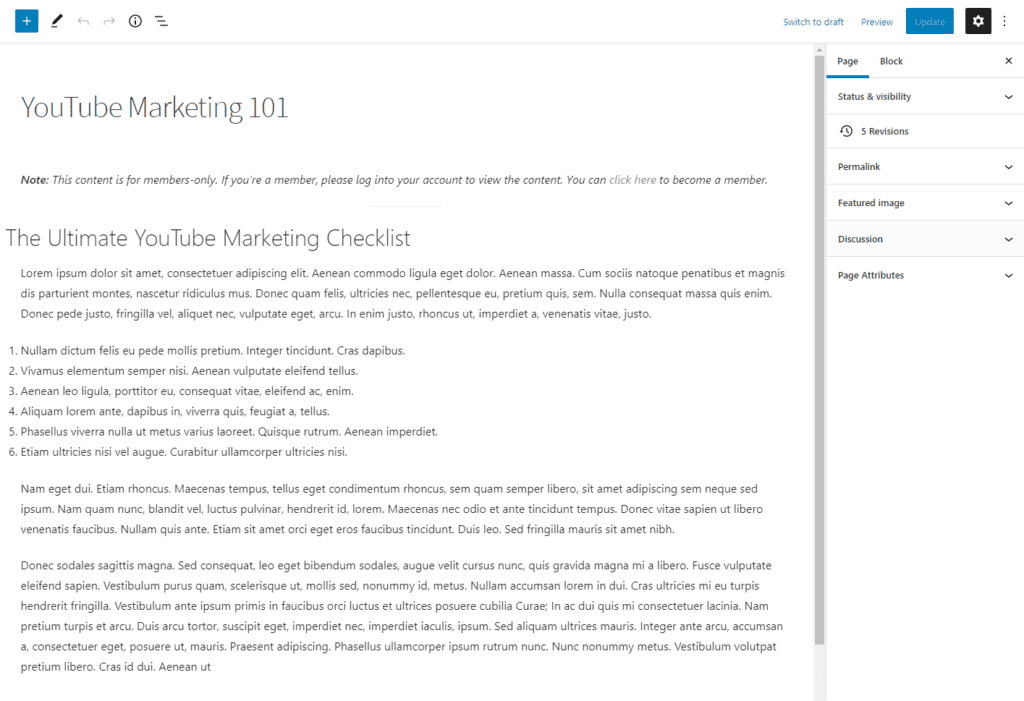
Pro tip: You can add a note or disclaimer at the top to let unauthorized users know how they can access the content!
Step #3: Configure conditions to show content to different users
Now that you’ve added content to a page or post in WordPress, the next step is to configure conditions. The conditions you set will determine which content is shown to different users on your website.
The good news is that the Conditional Blocks plugin makes this incredibly easy to do. Here’s what you need to do to add a condition to a Gutenberg block:
Select the block you want to add a condition to. From the Block settings on the right-hand side of the screen, click the Conditions tab and then the Configure Conditions button.
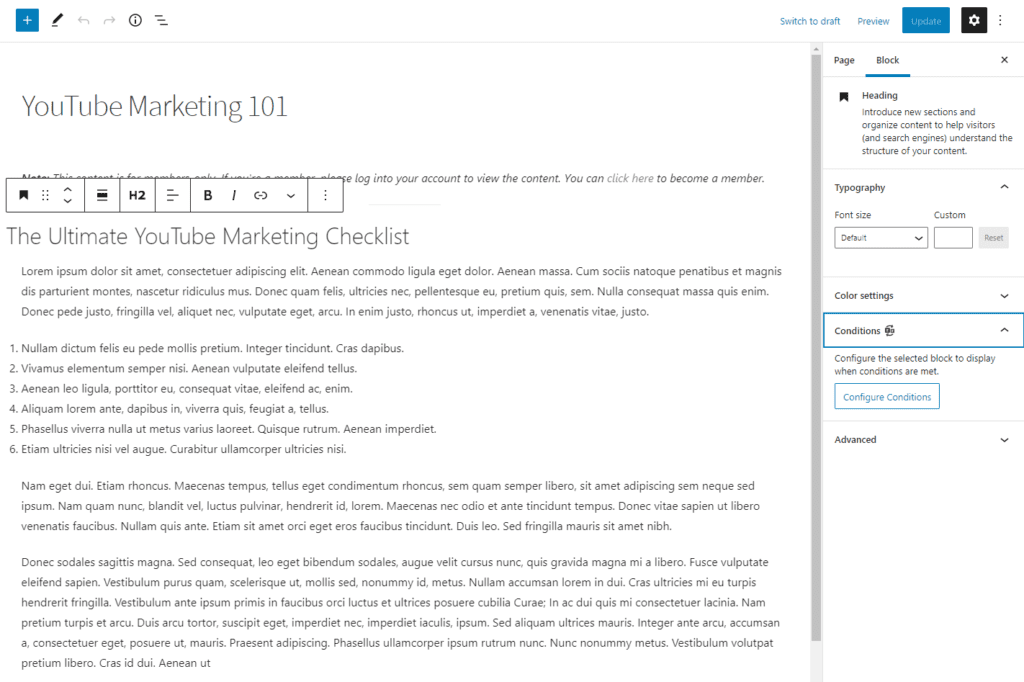
You’ll see a Conditionals Blocks Pro popup window on the screen. You can use this to add conditions for the block you selected.
Under the Current Block tab, click the Add condition button to get started. You can:
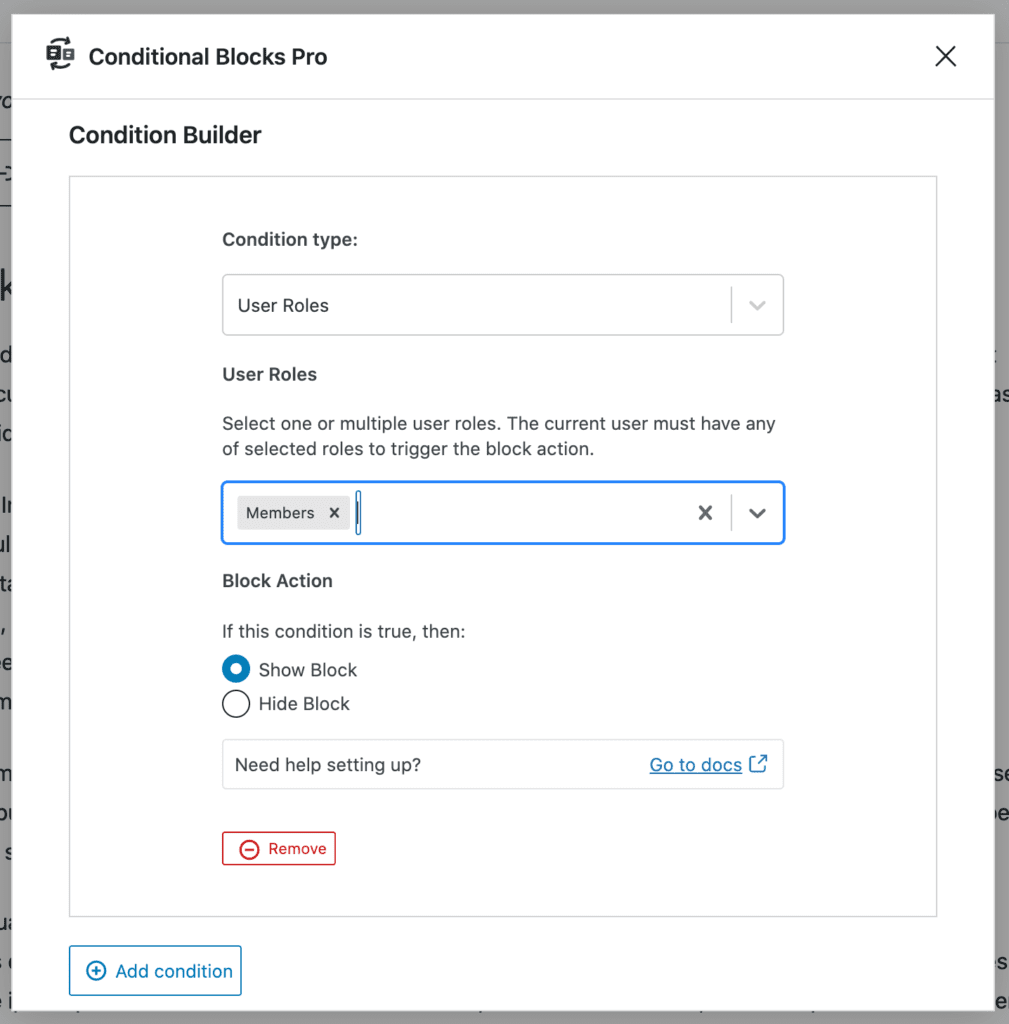
- Set a Condition type. Since we want to show personalized content to different users in WordPress, we’ll set this to User Roles.
- Select the user role you want to show the block to. We’ve selected Members.
- Choose to Show Block or Hide Block using the Block Action option.
You can set conditions for as many user roles as you’d like for each block. For example, if you had two types of member user roles – Silver Members and Gold Members – that you wanted to grant access to, you would simply select both user roles. It would look something like this:
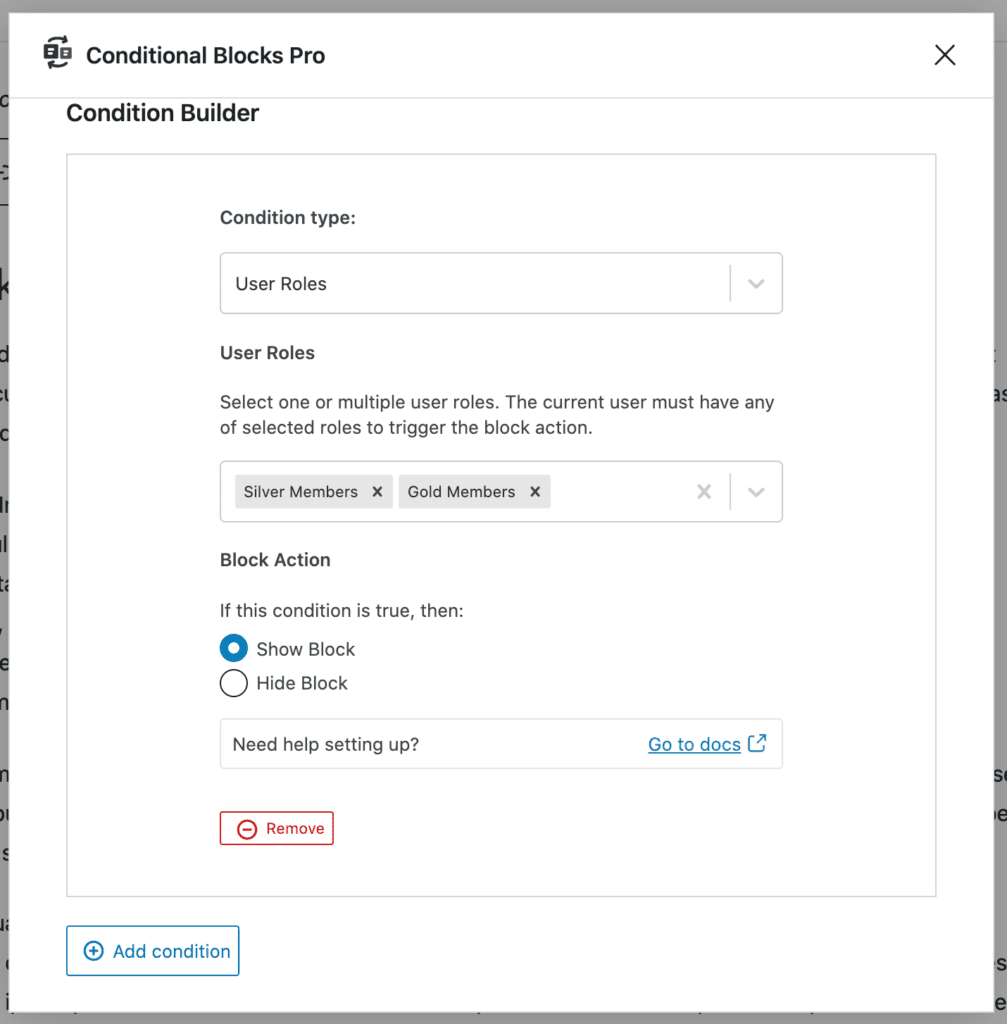
This will display the selected block to Silver Members and Gold Members. And, if you want to show a block to a user that has two user roles (for example a user that’s a Wholesale Customer and a Member) then you can create a new condition – one for Wholesale Customers and the second for Members.
Repeat these steps to add conditions to each block you want.
The Conditional Blocks plugin also lets you create presets using the Preset Manager. A preset is a group of conditions that can be applied across multiple blocks.
The page or post will look something like this when you’re done adding conditions:
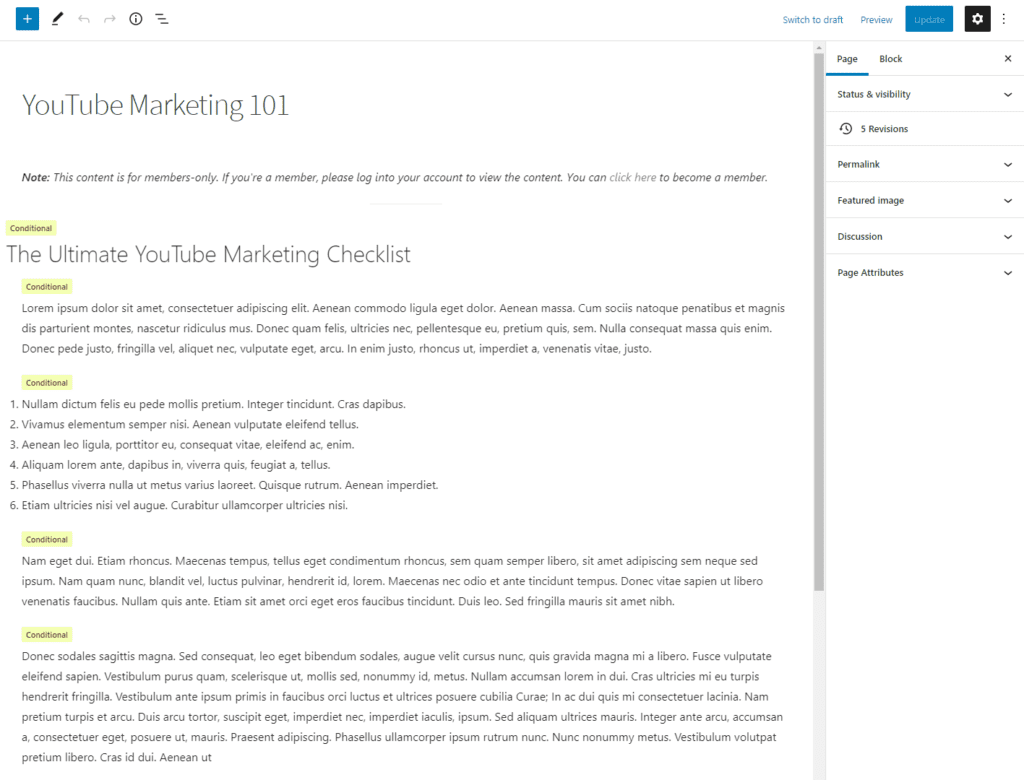
Click the Publish button to continue.
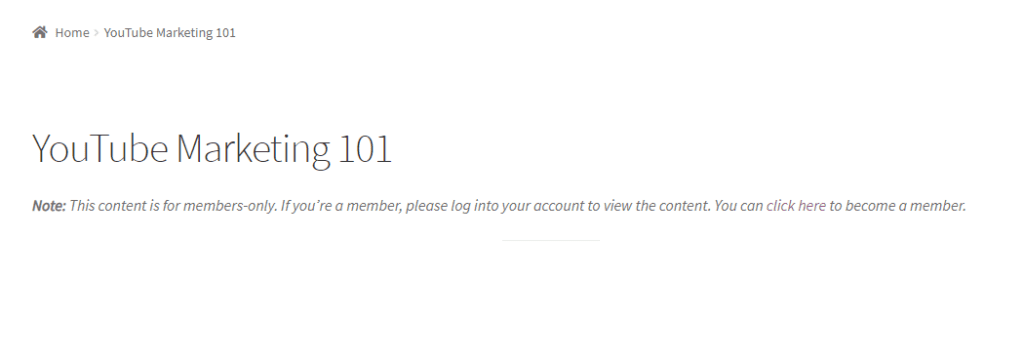
When an unauthorized user lands on the page, they’ll see the content blocks that aren’t exclusive to members.
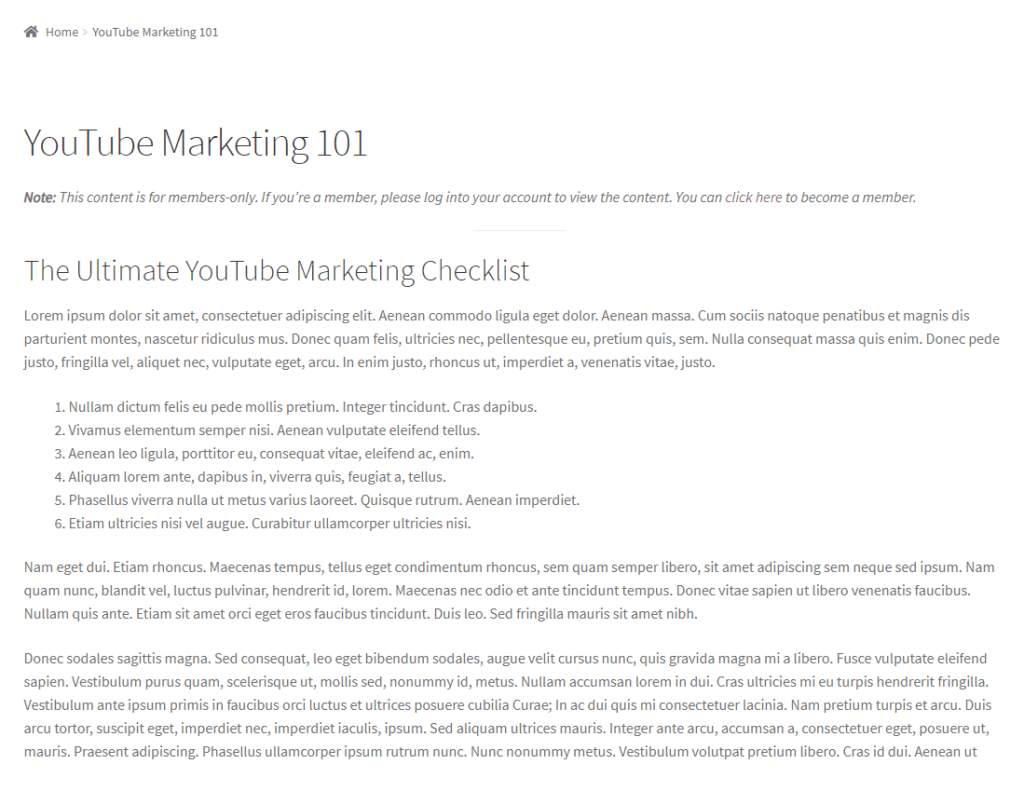
And here’s a preview of what members (authorized users) will see:
Bonus: hide content from users
Using Conditional Blocks, you can also choose to hide content blocks from specific user roles. Following our example from above, let’s say you wanted to show a content block to all users with the Members user role but hide it from users with the Wholesale Customer user role.
For this, you would create a condition that shows the block to Members and hides the block from Wholesale Customers. It would look something like this:
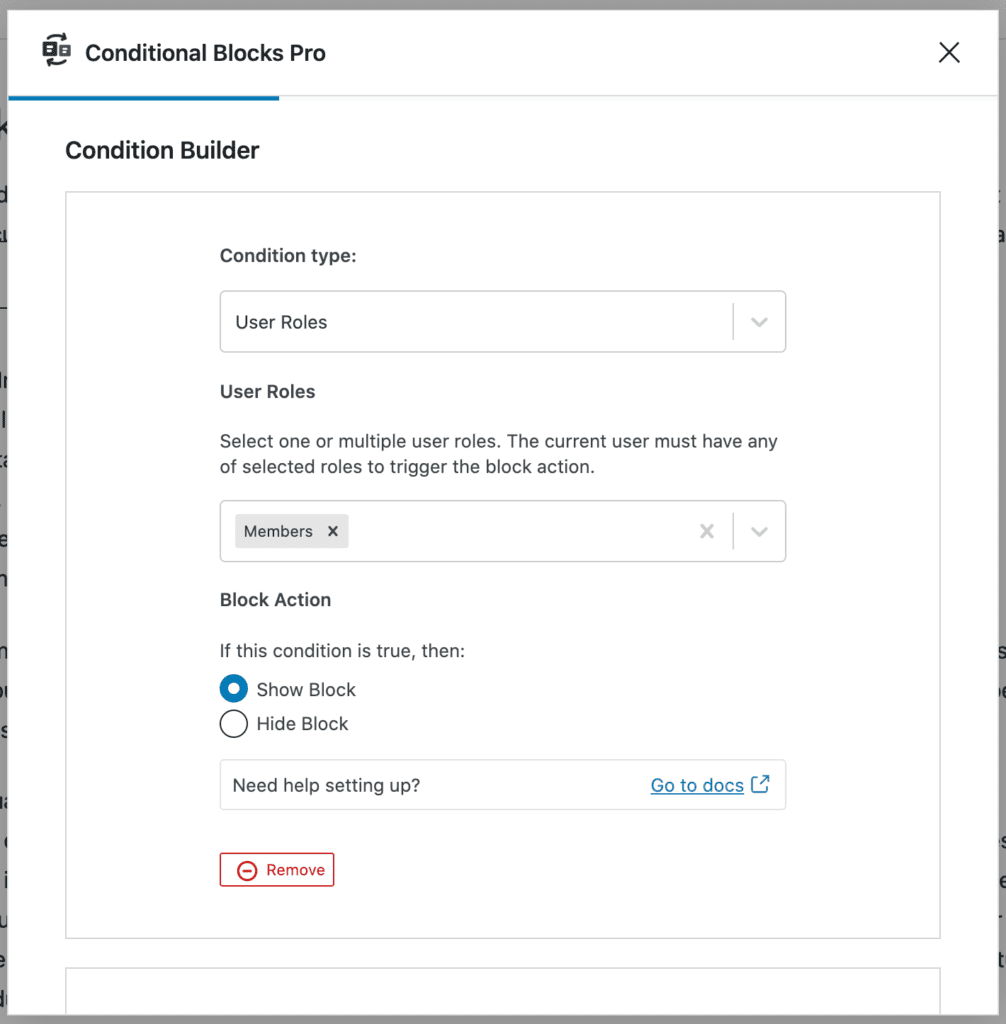
Show block to Members 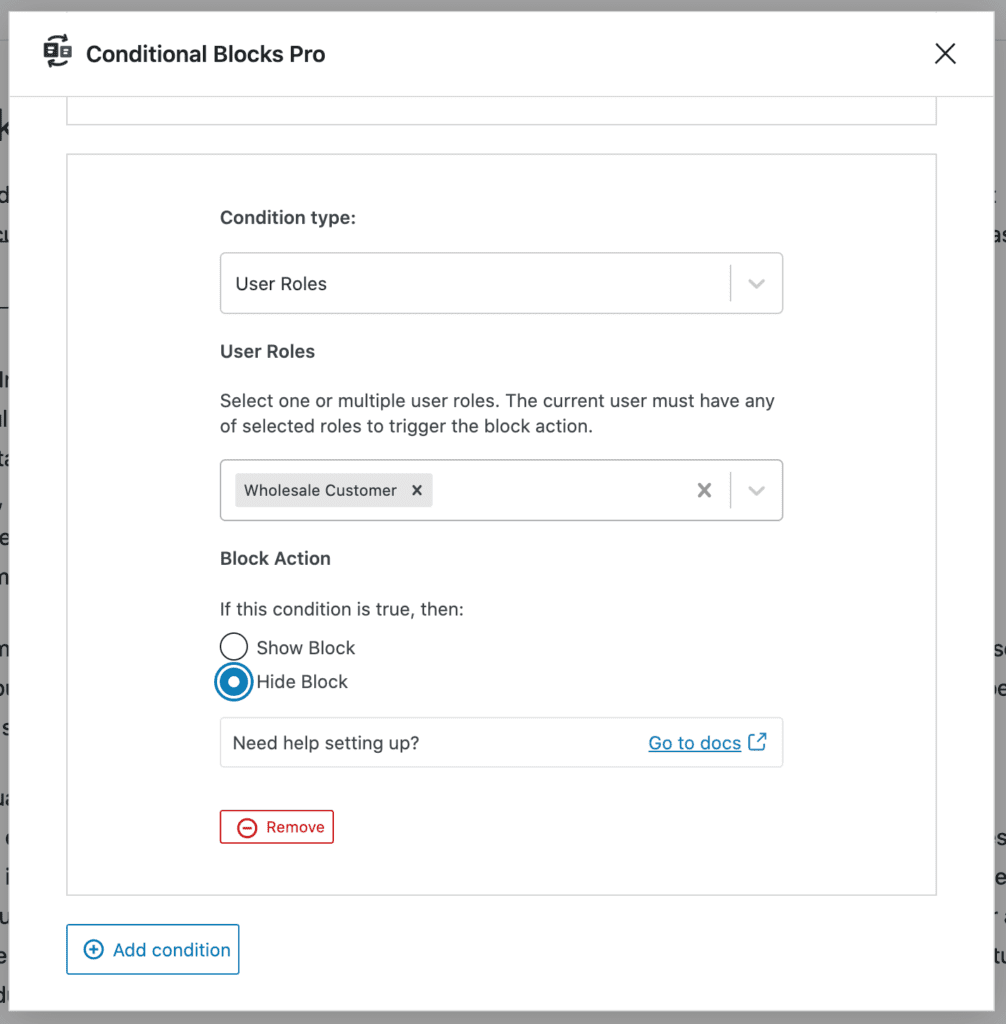
Hide block from Wholesale Customers
This is particularly useful for websites that cater to users with multiple user roles.
Conclusion
The Conditional Blocks plugin makes it easy to show personalized content to different users in WordPress. All you have to do is set the conditions that determine which content block is shown to which user role.
We showed you how to display personalized content to different users in WordPress. Hopefully, you’re in a good position now to take the next steps.
You can get in touch with customer support if you’re looking for condition types we didn’t cover in this article.
Ready to start showing personalized content to different users? Get Conditional Blocks today!

