You want a “spend $20 more for free shipping” message on your cart page. Customers respond to these – they add another item, your average order value goes up, everybody wins.
So you search for a plugin. You find a dozen options: Free Shipping Bar for WooCommerce, Amount Left for Free Shipping, Free Shipping Label and Progress Bar. All doing variations of the same thing.
Then you want cart upsells to recommend products based on what’s in the cart. Another plugin. Then notices for returning customers. Another plugin.
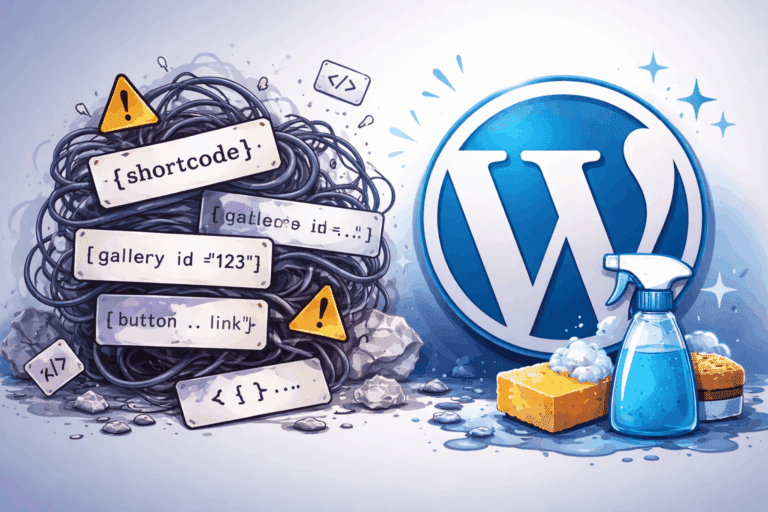
Before you know it, you’ve got three plugins doing three narrow things. Three settings pages. Three plugins to keep updated. Three potential conflicts when WooCommerce pushes an update.
There’s a simpler way.
The Limitation of Single-Purpose Plugins
The popular free shipping bar plugins work fine. Free Shipping Bar for WooCommerce has over a million downloads. Amount Left for Free Shipping updates the number in real-time. Free Shipping Label and Progress Bar works with the newer block-based cart.
Cart upsell plugins work too. Cart Upsell for WooCommerce from the official marketplace. UpsellWP for personalized offers. FunnelKit for slide-out carts.
Here’s the catch: each one does one thing, their way.
You get their design templates. Their placement options. Their idea of what a shipping bar should look like. If you want to match your store’s branding, you’re limited to their customization settings. If you want the message somewhere they didn’t plan for, you’re out of luck.
And you can’t combine logic. What if you want to hide the free shipping message for wholesale customers who already get free shipping? What if you want different upsells for first-time buyers versus returning customers? Single-purpose plugins don’t handle that.
A Different Approach: You Design It, You Place It
Here’s another way to think about cart messaging.
You create the content yourself – a message, a product recommendation, a banner – using the WordPress block editor. Style it exactly how you want. Match your store’s look and feel.
Then you add a visibility condition: show this when the cart is under $50. Or show this when the customer has shoes in their cart. Or show this when they’re a returning customer who’s spent over $200 with you before.
That’s what Conditional Blocks does. You get WooCommerce-specific conditions like cart value, products in cart, cart product categories, and customer lifetime spend.
You control the design. You control the placement. The plugin just handles the “when does this show” logic.
Example: Building a Free Shipping Notice
Let’s recreate what those shipping bar plugins do – but with full control.
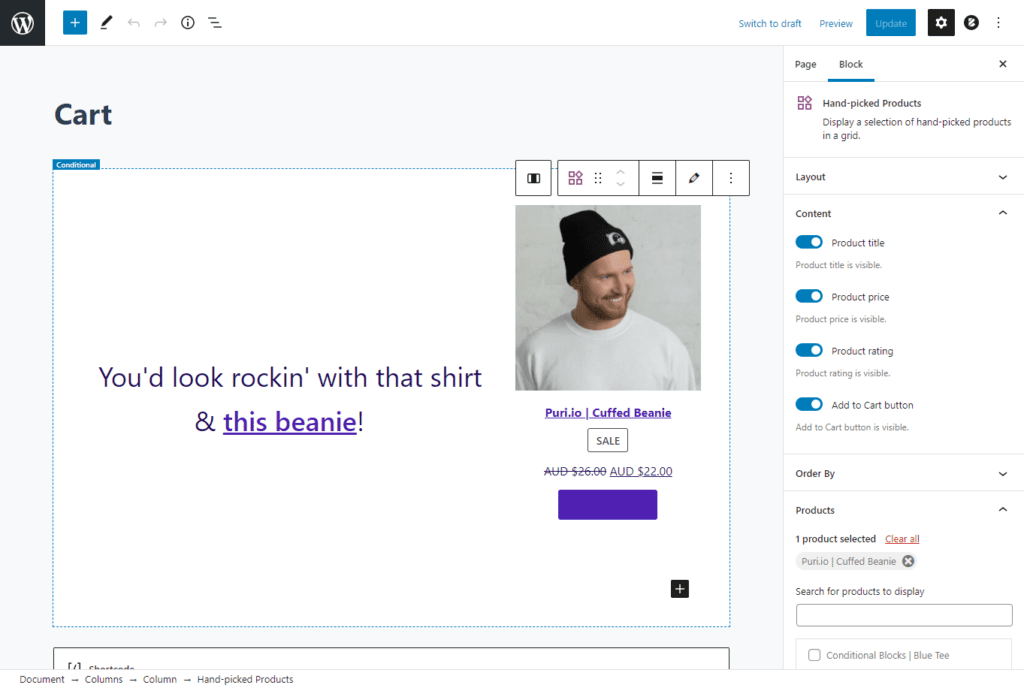
Step 1: Create your message.
In your cart page (or using the Site Editor if you’re on a block theme), add a Group block. Write your message: “You’re $20 away from free shipping!” Add a background color, some padding, maybe an icon. Make it match your store.
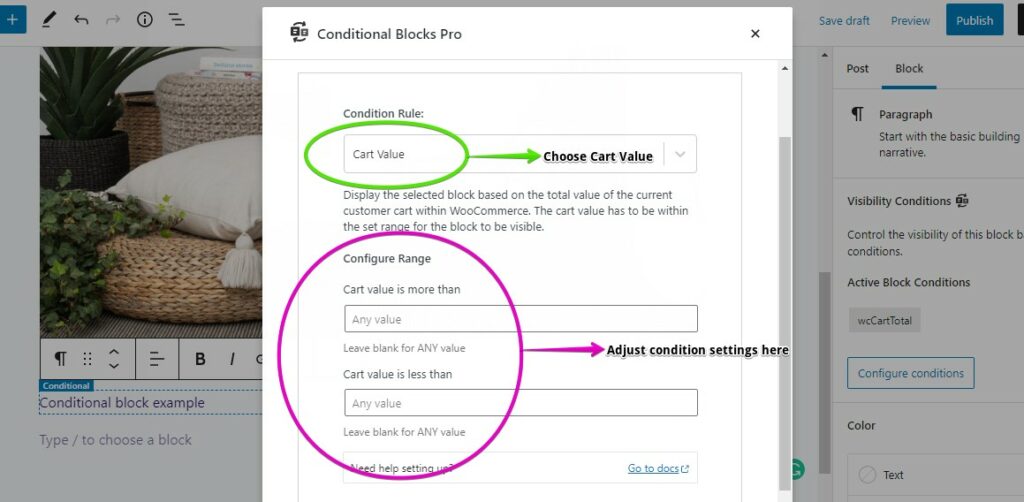
Step 2: Add the condition.
Select the block, click “Visibility Conditions,” and add the Cart Value condition. Set it to show when the cart total is less than $50 (or whatever your free shipping threshold is).
Step 3: Add a success message.
Create another block: “Nice! You’ve unlocked free shipping.” Set it to show when cart value hits $50 or more.
Now your customers see a personalized message that updates as they shop. When they’re below the threshold, they see encouragement to add more. When they qualify, they see confirmation.
Want to get fancy? Add another condition to hide the whole thing for logged-in wholesale customers who already get free shipping. Or show a different message to customers in regions where you don’t offer free shipping. Single-purpose plugins can’t do that – you’d need yet another plugin.
Example: Cart-Based Product Recommendations
Same idea, different conditions. This is where you can really move the needle on average order value.
Show products based on what’s in the cart:
Create a block featuring a product you want to upsell. Add the Products in Cart condition. Set it to show when a specific product is in the cart.
Customer adds the black t-shirt? Show them the matching cap. Customer adds the starter kit? Show them the pro upgrade.
You’re hand-picking the recommendations – not relying on WooCommerce’s “related products” algorithm to figure it out.
Show recommendations by category:
Use the Cart Product Categories condition. When anything from “Shoes” is in the cart, show your socks and shoe care products. When anything from “Coffee” is in the cart, show your grinder and filters.
Great for stores with clear product pairings – you know what goes together better than any algorithm.
Show offers based on cart value:
Cart under $30? Show a “bundle and save” offer to bump them up. Cart over $100? Show a premium add-on to round out their order.
More Ways to Increase Sales
Once you can show any content based on cart conditions, the ideas multiply:
Nudge toward quantity discounts. “Add 2 more and save 15%!” Show it when item count is below your discount threshold. Customers who planned to buy one end up buying three.
Reward big spenders. Use the Customer Total Spent condition. Customers who’ve spent over $500 lifetime see a “thank you for being a loyal customer” message with an exclusive offer. First-time buyers see your standard messaging.
Personalize by location. Combine cart conditions with geolocation. UK customers see UK delivery estimates. EU customers see VAT information. US customers see your standard shipping tiers. One cart page, multiple experiences.
Welcome first-time shoppers. Show a welcome discount to visitors who aren’t logged in and have items in their cart. Returning customers see different messaging.
Each of these would normally require a separate plugin – or custom development. With Conditional Blocks, you’re just adding conditions to content you create.
Put Your Messages Where They Matter
If you’re using a block theme (most modern themes are), you can edit your WooCommerce templates directly in the Site Editor. That means you can place your conditional content anywhere:
- Cart page – above the product list, below the totals, in a sidebar
- Checkout page – remind them about free shipping, show last-chance upsells
- Mini-cart – if your theme has a slide-out cart, add messages there too
- Product pages – show “frequently bought together” blocks based on the current product
- Site-wide header – run a “free shipping over $50” banner that disappears once they qualify
Dedicated plugins usually give you two or three placement options. With block themes and Conditional Blocks, you put content wherever it makes sense for your store.
When a Dedicated Plugin Makes Sense
Sometimes the single-purpose plugins are the right choice.
You want zero design work. The shipping bar plugins come with templates ready to go. Pick one, set your threshold, done.
You need specific features. Some plugins have animated progress bars, gamification, or A/B testing built in. If you need those exact features, use the plugin that has them.
You’re on a classic theme. The “place it anywhere in your templates” advantage requires a block theme. On classic themes, you can still use Conditional Blocks on pages – but you won’t have the same template flexibility.
Conditional Blocks fits better when you want:
- Design control that matches your brand
- Flexibility to place messages anywhere in your templates
- The ability to combine conditions (cart value + customer type + location)
- Fewer plugins to manage overall
Build It Your Way
You don’t need a plugin for every cart messaging idea. Build the content, add the condition, place it where it counts.
Your design. Your placement. Logic that actually fits how your store works.