Persistent scheduling is one of the best ways to make your WordPress content creation highly efficient. With the help of the WordPress Block Editor, you can publish content immediately or set a later date.
However, WordPress publishing is limited to a per-post basis. If you only want to schedule a small content block, you need to make a separate blog post or page. You’ll then need to manually switch the WordPress content. This is not ideal for content you want automatically displayed after midnight or on specific days of the week. It will also take a lot of time and make the workflow unreliable.
The solution? You can simply use Conditional Blocks’ Date Recurring Condition to schedule separate blocks based on specified dates!
The Conditional Blocks Date Recurring Condition
The Date Recurring condition can be set to show any content block according to specific time frames per day. For example, you can show a block that contains a discount offer every Wednesday or Friday. On other days, you can just make different content blocks visible.
Aside from discounts and promos, the Date Recurring condition can be used for special reminders for registered members. Perhaps you have an upcoming event or a limited product giveaway.
Benefits of Using Date Recurring Condition
The Date Recurring condition will help you save time. Instead of republishing posts manually, you can just use the Date Recurring condition to make a content block visible on recurring dates. There’s no need to republish the content block because the condition does that automatically!
Another main benefit of the Date Recurring Condition is convenience. If you want to show different content blocks every other day, you can just set it easily in the Condition Builder. Aside from the day, you can also set the time frame for the chosen block to be visible.
Lastly, the Date Recurring Condition can improve the profitability of your WooCommerce store or WordPress site. Such an improvement is possible because the Date Recurring Condition can direct site visitors, subscribers, or members to important blocks like exclusive promo offers or sale announcements.
How to Set Up the Date Recurring Condition?
Setting up the Date Recurring Condition is easy and straightforward. We’ll show you the step-by-step process in this article section.
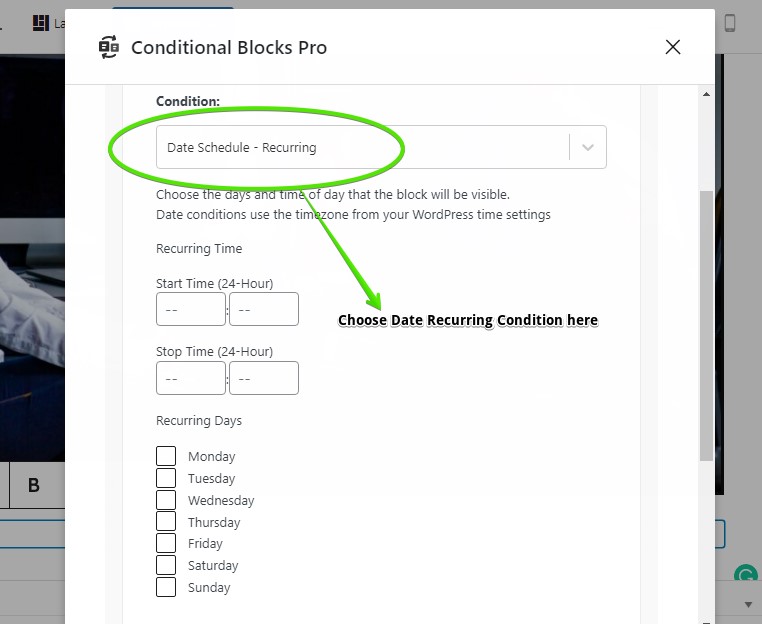
First, you must choose a content block that will be shown on a recurring basis. Next, click the configure conditions button in the block sidebar and choose the Date Recurring Condition.
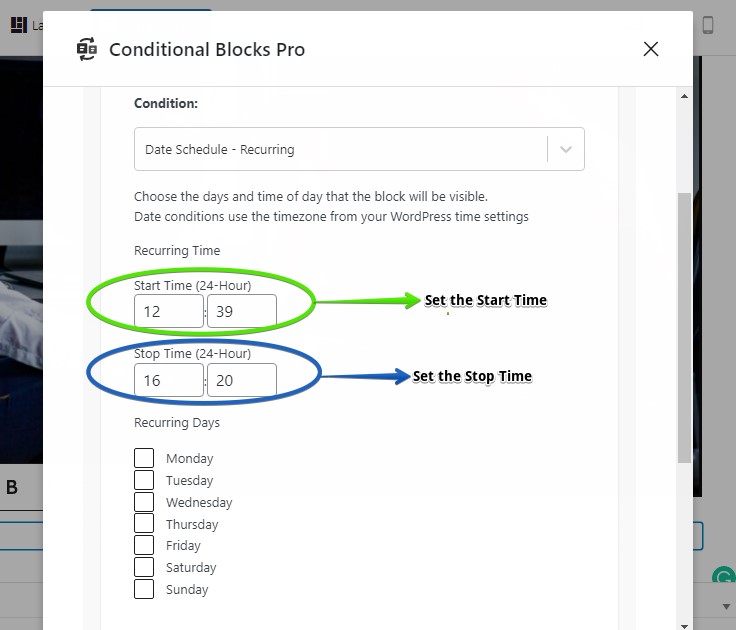
Next, you can pick a Start Time and Stop Time based on a 24-hour cycle if you want the block to be visible between set hours of the day. You can also toggle the checkboxes of the days that you want the block to recur.
Tip: Leaving the Start and Stop Time blank will display the block for the full 24 hours on the selected weekdays.
How to Set Up the Date Range Condition?
Aside from the Recurring condition, you can also use the plain Date Range condition. This condition is similar to Date Recurring but it is focused on having a fixed range of date for the block to be visible.
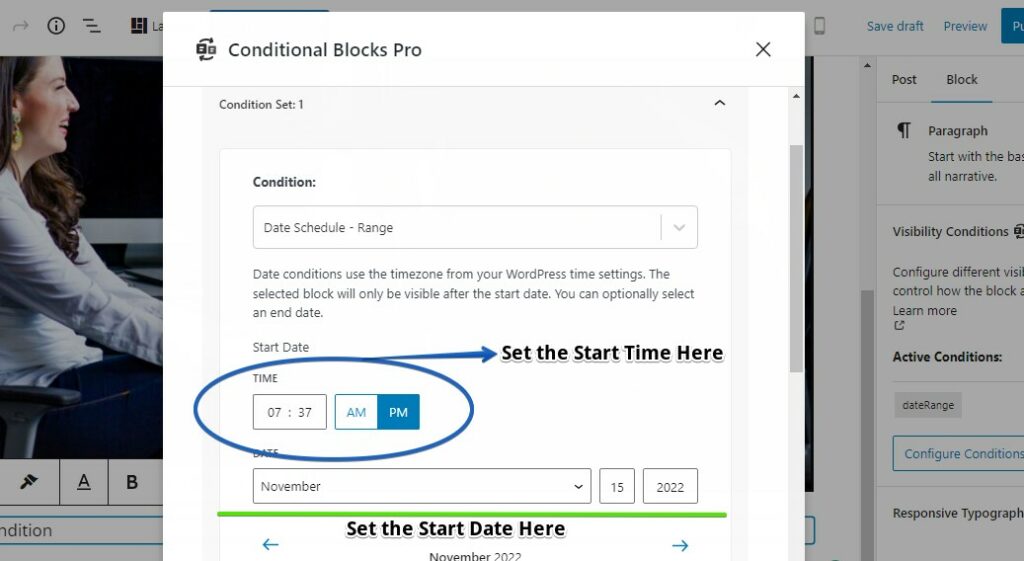
Choose the Date Schedule Range condition from the Condition Builder. Afterwards, you can now set the start date for the block. The block will then be visible after the start date.
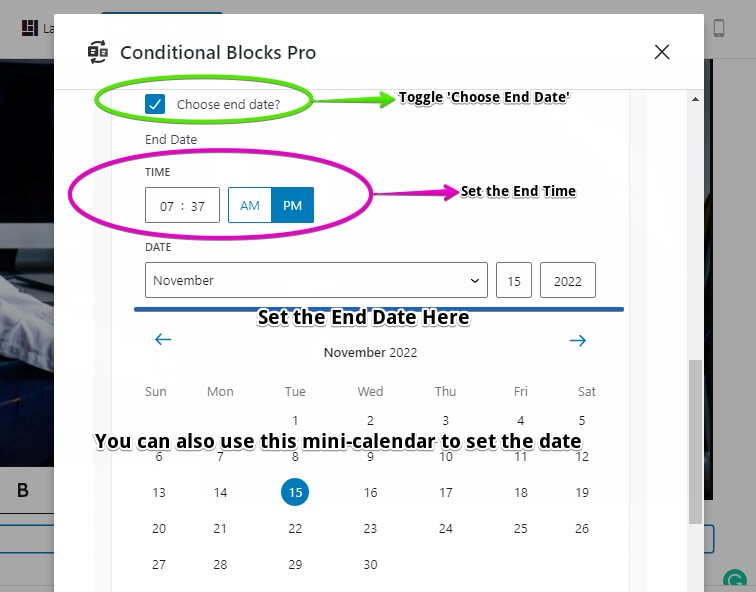
You can also set an end date for the block. Once the end date arrives, the block will no longer be visible.
Keep in mind that the two types of Date conditions rely on the timezone set by your WordPress settings and not your actual location.
Advanced Use of The Date Range Condition
The Date Range Condition is flexible enough to combine multiple ranges through the AND/OR functions. This capability is useful if you want to merge different date-based conditions such as a weekly event or a Christmas holiday event announcement.
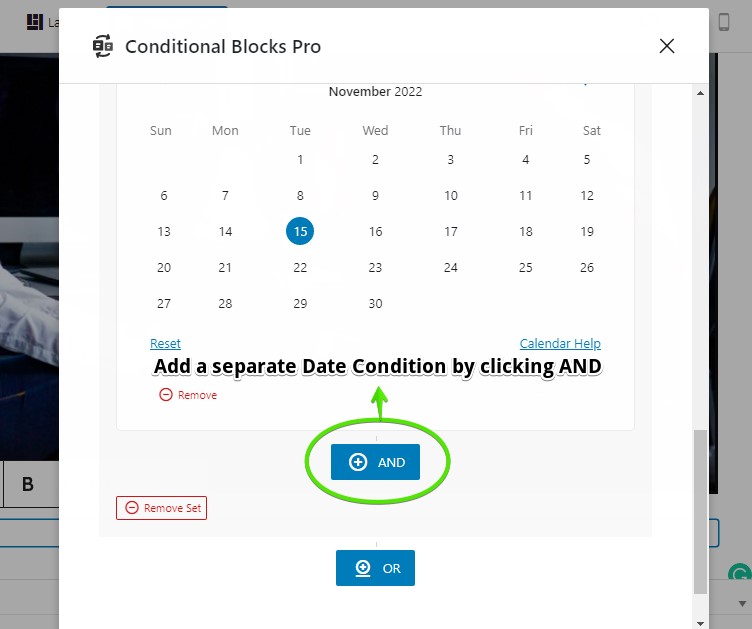
Additionally, you can click the OR button to add a whole new condition that can work side by side with the Date Range Condition. For example, you can add the User Role Condition to limit the visibility of the block according to the chosen roles. This function works on top of the date range that you’ve set.
Final Reminder
Making your content blocks visible through the Date Range Condition is always a smart move. By using the condition, you can definitely save time and focus on content blocks that matter. Plus, you can also combine the Date Range Condition with other conditions to create unique and flexible use cases.
All date related display conditions are available in the Conditional Blocks Pro plugin for WordPress.