Though it may seem counterintuitive at first, one way to increase sales and your average order value is by … offering discounts.
Yes, you read that right!
By offering discounts, you can sell products that customers may not have bought otherwise. Put simply, you can sell products at prices that are closest to the buyer’s reservation price in order to maximize profits.
This article will explain how you can set up periodic discounts in WooCommerce to maximize sales and profits. We’ll do this using the Conditional Blocks plugin.
Offering periodic discounts in WooCommerce
For those unfamiliar, periodic discounts means to vary the price of products in a predictable way over time. Generally speaking, store owners do this to maximize sales and profits. By implementing periodic discounts, they’re able to sell to customers at a price point that’s closest to the maximum price they’re willing to pay.
There are plenty of scenarios where it might make sense to offer periodic discounts rather than sticking to the same price:
- Daily or weekly deals. If you run a daily or weekly deals site, you can set up periodic discounts to maximize sales. For example, if you offer deals on software, you can set up periodic discounts to offer better deals to customers towards the end of the sale period.
- Online shopping events. Regardless of the type of products you sell, you can offer periodic discounts on products for online shopping events like Black Friday or Cyber Monday to maximize profits.
- Incentivizing subscribers. Offering exclusive periodic discounts is a great way to incentivize people to sign up for your email list.
- Seasonal discounts. Instead of offering a flat discount on out-of-season products, you can set up periodic discounts. The benefit of this is that you can sell to each potential buyer at a price closest to what they’re willing to pay in order to maximize sales.
Periodic discounts work because they create a sense of urgency in the buyer’s mind.
Let’s say you’ve been eyeing a pair of $50 sandals. They’ve just gone on sale and you can get them for $44. If you wait, the price might drop to $42, BUT the sandals might also go out of stock. So, why not buy them now?
By setting up periodic discounts in WooCommerce, you can effectively boost sales and maximize profits for your business.
How to set up a periodic discounts page in WooCommerce
Now that you have a better idea about what periodic discounts are, let’s take a look at how you can set them up in WooCommerce.
Here we’ll show you step-by-step how to set up periodic discounts in WooCommerce. For this, you’ll need the Conditional Blocks plugin.
Step #1: Install the Conditional Blocks plugin
Get the Conditional Blocks plugin if you haven’t done so already. You can use this plugin to set up discounts based on date ranges or on a recurring basis.
Install and activate the Conditional Blocks plugin on your WordPress website. Next, enter the license key you received at the time of purchase to start using the plugin.
Step #2: Setup discounts for your products
Make a plan of what products you’re going to discount. There’s several ways you can offer a discount on the products. You can do this by creating a separate product category (e.g. Summer Sale category) and adding all discounted products to that category. Alternatively, you can set up a coupon to offer a discount.
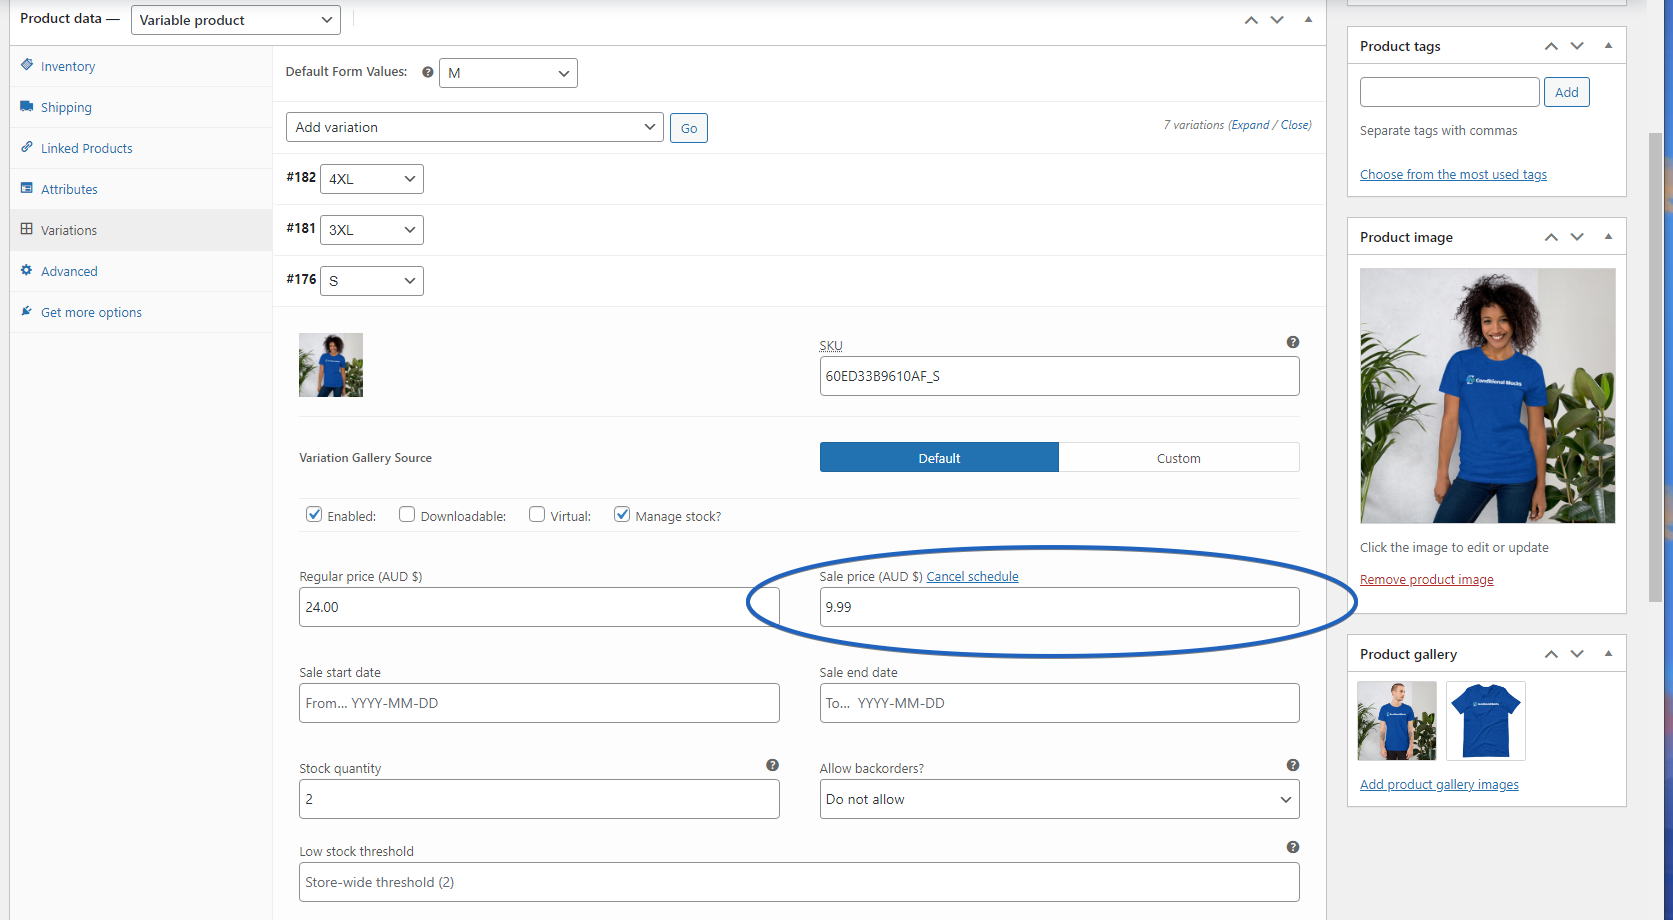
Discount products directly: You can manually add a sale price to any product using a sechdule.
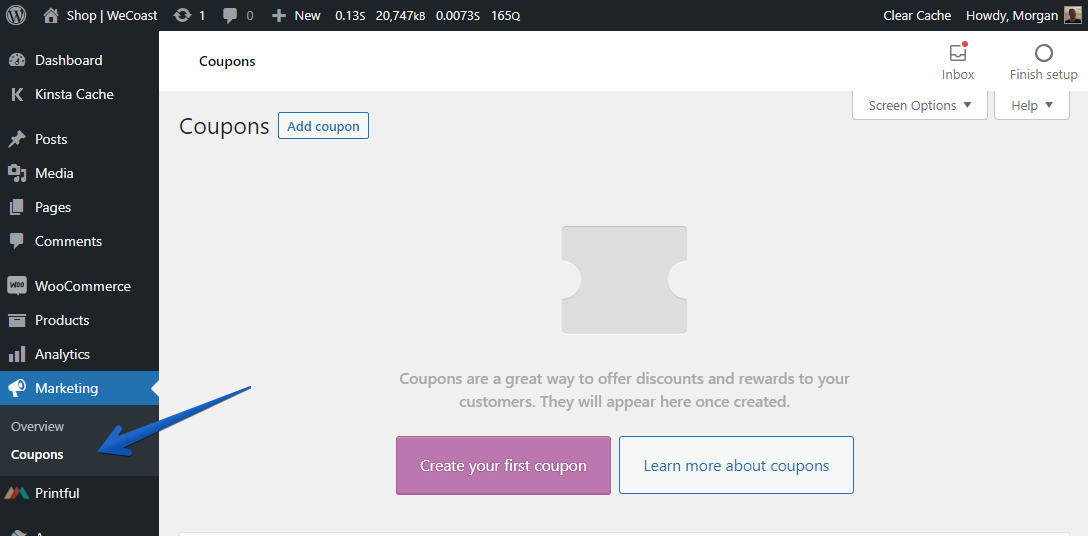
Using Coupon Codes: Create a new coupon in WooCommerce that only applies to your choosen products and make sure you set an expiry time for the coupon.
Step #3: Creating a sales landing page
The next step is to create a page (or post) in WordPress that you’ll add WooCommerce products to. If you already have an existing page (like a deals page) you can simply edit it instead.
There are three important (dynamic) parts we recommend to create this. We’ll use Conditional Blocks to schedule the visibility of each part.
We recommend that you use Group Blocks to contain each section. Visibility conditions can be applied to a Group block itself.
Sections for the landing page:
- What customers see before the sale starts (perfect for capturing emails).
- What customers see during the sale (add products here).
- What customers see after the sale (perfect for capturing emails).
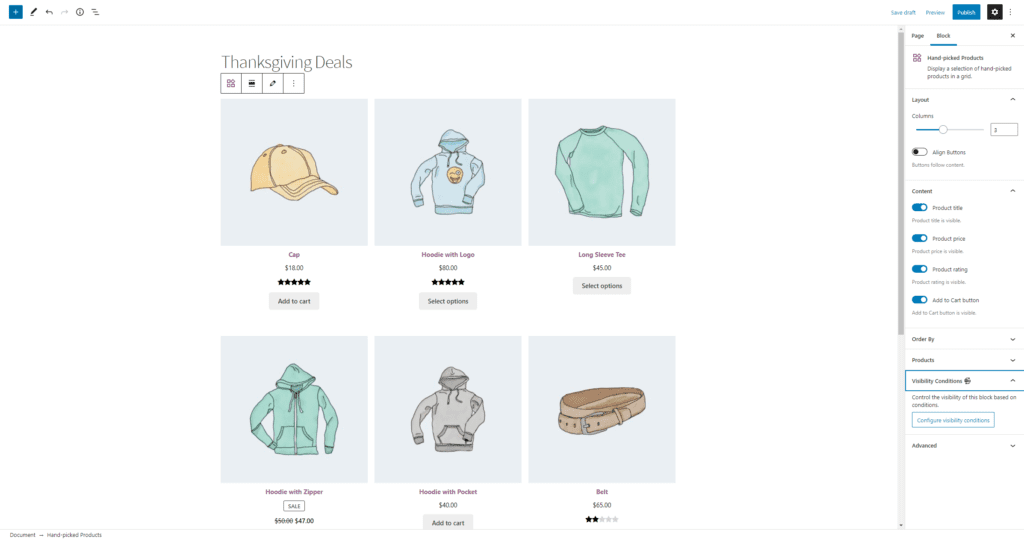
WooCommerce has different blocks that open up various ways you can display your products depending on which products you want to offer periodic discounts on. For example, you can add a Products by Category block, On Sale Products, or even a Hand-Picked Products block.
Build out the page with the content and products that your require for each section.
Step #4: Configure conditions to set up periodic discounts sections
Once you’ve created the sections, we can pull all the pieces together and sechdule each section.
Each section will of course need to match up to your chosen sale/discount expiry. That’s where Conditional Blocks comes in. We’ll show you how to set up periodic discounts for a specific duration or on a recurring basis.
Date Schedule – Range
The Date Schedule – Range condition lets you schedule the deal to be displayed between set dates. This is perfect for stores that want to show customers deals around the holiday season. You can use this to offer customers special prices on products during events like Black Friday or Cyber Monday.
How to set up periodic discounts for specific days
Start by clicking on the block you want to show customers on specific dates only. Next, click the Visibility Conditions options in the sidebar on the right and click the Configure conditions button.
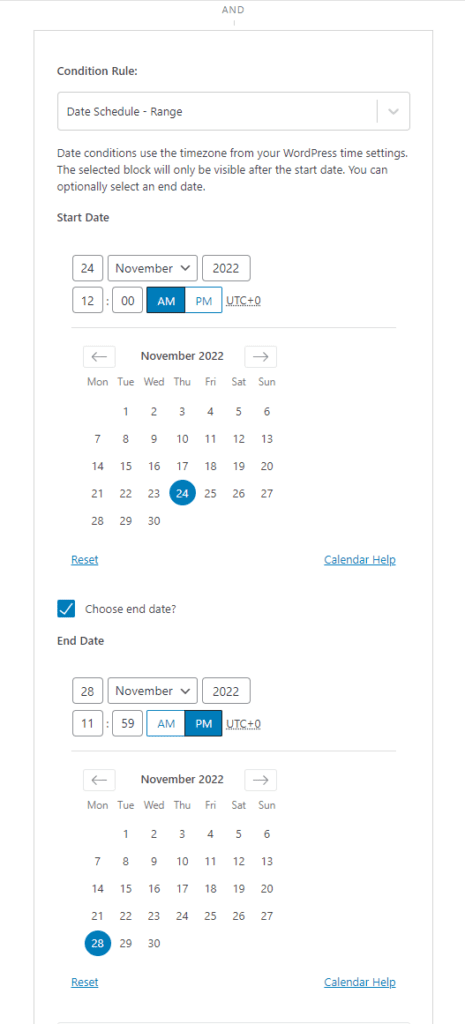
Click the Add condition button and select Date Schedule – Range using the Condition Rule dropdown. By default, the condition builder prompts you to set a Start Date. This is the date and time the block will become visible to visitors on your website.

Once that’s done, click the checkbox next to the Choose end date? option to enter an end date. This way, you can set a date schedule that spans a few days. This is perfect for making the deals visible from Thanksgiving day to the Monday after. It will look something like this:
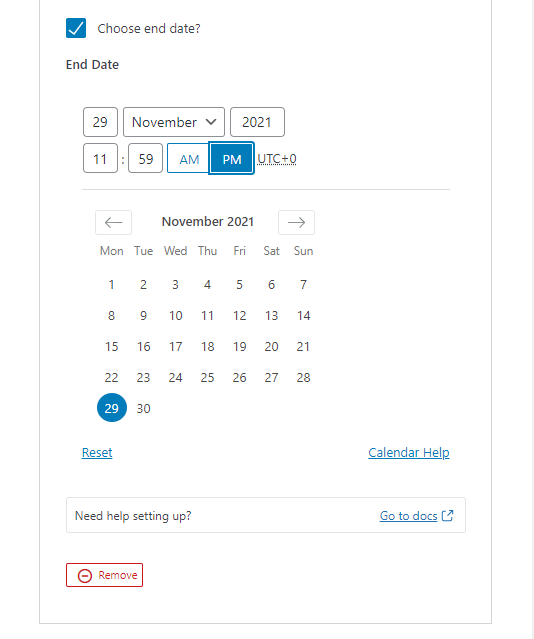
That’s it! Now, the deals block will be visible only around the Thanksgiving holidays.
You might also want to display the block for the Thanksgiving holidays next year. To do this, you can simply click the Add condition button and set a start and end date for the next year. This way, you don’t have to worry about setting up deals the next year – the Conditional Blocks plugin will take care of it for you.
Similarly, you can set one (or multiple) Date Schedule – Range rules for specific days only. This is perfect for offering special deals or products on a specific day only instead of for a few days.
Date Schedule – Recurring
The Date Schedule – Recurring rule lets you show blocks between certain timeframes on a recurring schedule. For example, you can set it up to show selected blocks every weekend, on Mondays only, or every other day. This method is perfect for weekly deal sites that want to offer discounts every Saturday.
How to set up periodic discounts on a recurring basis
Start by clicking on the block you want to show on a specific day(s) every week. Next, click the Visibility Conditions options in the sidebar on the right and click the Configure conditions button.
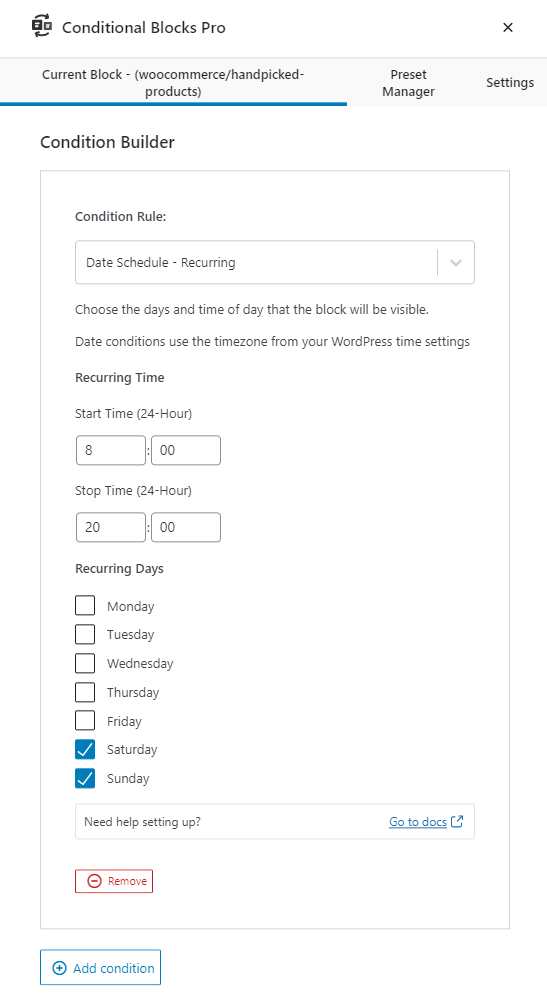
Click the Add condition button and select Date Schedule – Recurring using the Condition Rule dropdown. You’ll be prompted to choose the day(s) and time of day the block will be visible.
So, if you want to make the block visible on weekends only between 8 am and 8 pm, it will look something like this:
You can also use Date Schedule – Recurring to make the block visible on different days at different times.
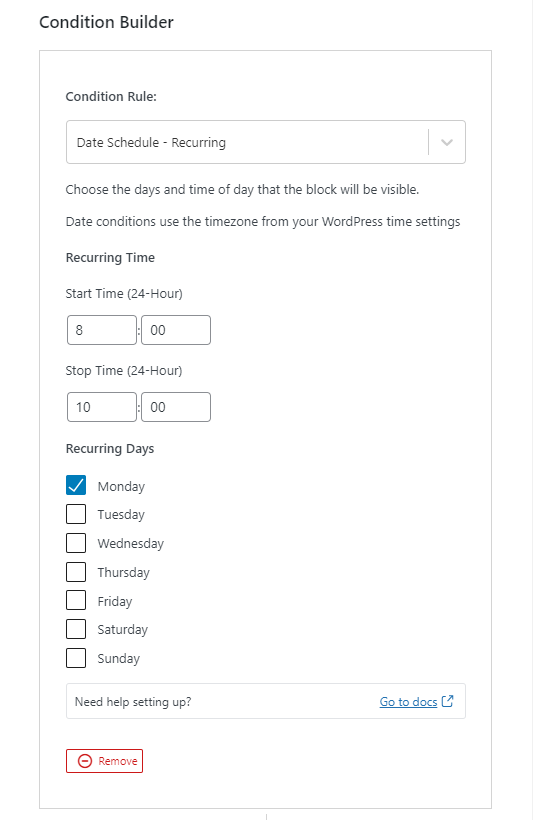
1 – Mondays 8 am to 10 am 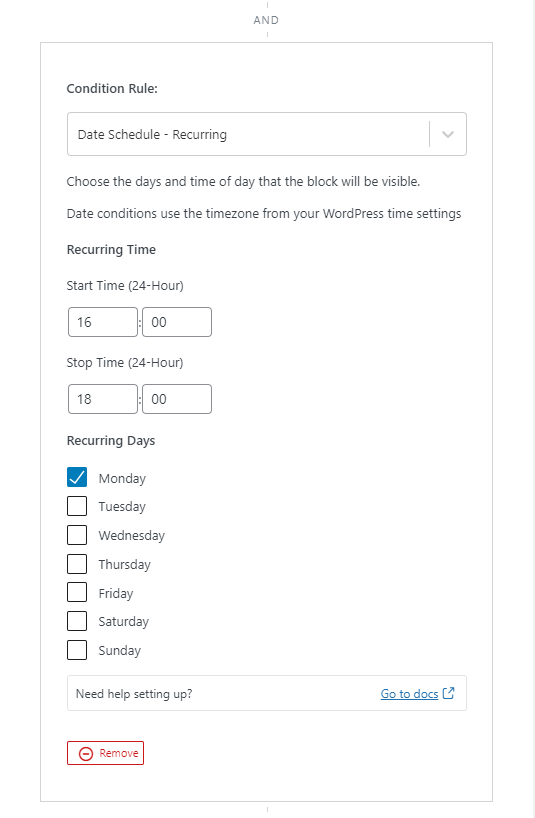
2- Mondays 4 pm to 6 pm 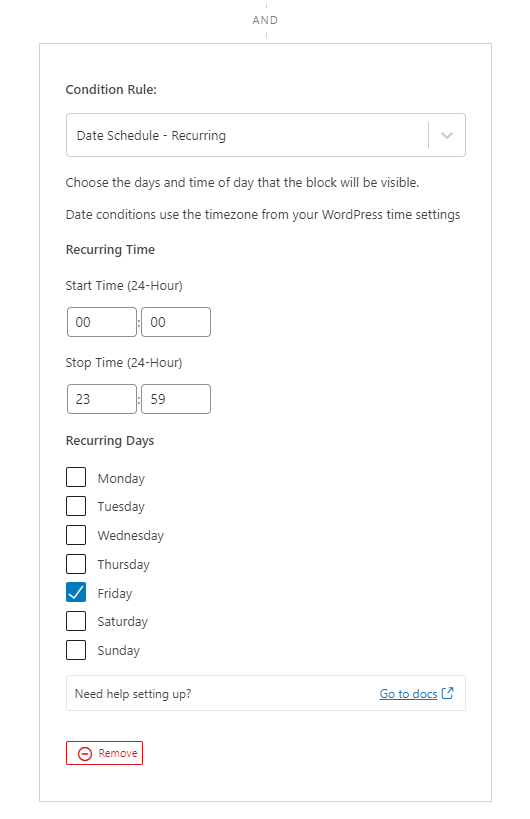
3 – All day on Fridays
So, for example, if you wanted to make the block visible on Mondays between 8 am and 10 am, Mondays between 4 pm and 6 pm, and all day on Friday, you could set three separate Date Schedule – Recurring rules for the same block.
TIP: Give people a reason to come back
Let’s say a person came late to your sale. They missed out, there’s no more discounts. What now?
You want to do everything you can do secure a sale, that’s why we recommend creating a section to display after the sale has finished.
The late person might do two things.
- If they need the product urgently they could purchase anyway
- If they are happy to wait for another sale, make sure you have an email list signup ready. That way, you can notify everyone on the list when the product goes on sale next.
Use Conditional Blocks to schedule the “Sale Expired” content with the email list information ahead of time. You should align the blocks to appear as soon as the sale expires.
Conclusion
That’s it!
You now have a dynamic sales landing page ready and scheduled with WordPress & WooCommerce.
You can get in touch with customer support if you have any questions.
Looking for an easy way to set up periodic discounts in WooCommerce? Get Conditional Blocks today!