The Advanced Custom Fields (ACF) plugin integration will automatically add the all the field groups & fields you’ve created within ACF to the Conditional Blocks settings. This means you’ll be able to control the visibility of any WordPress content block by detecting the ACF field value. Best of all, it only takes a few clicks to setup!
Requirements
- Advanced Custom Fields (Free or Pro) installed in WordPress
- Conditional Blocks Pro installed in WordPress
How to control block visibility based an ACF field
You’re likely already been using ACF in one way or another to structure the content of your WordPress site. Therefore this guide will be a simplistic overview on setting up ACF data fields, and then using those within the WordPress Block Editor.
Yes this guide will also apply to WordPress full site editing (FSE) since it’s the same principal with content blocks.
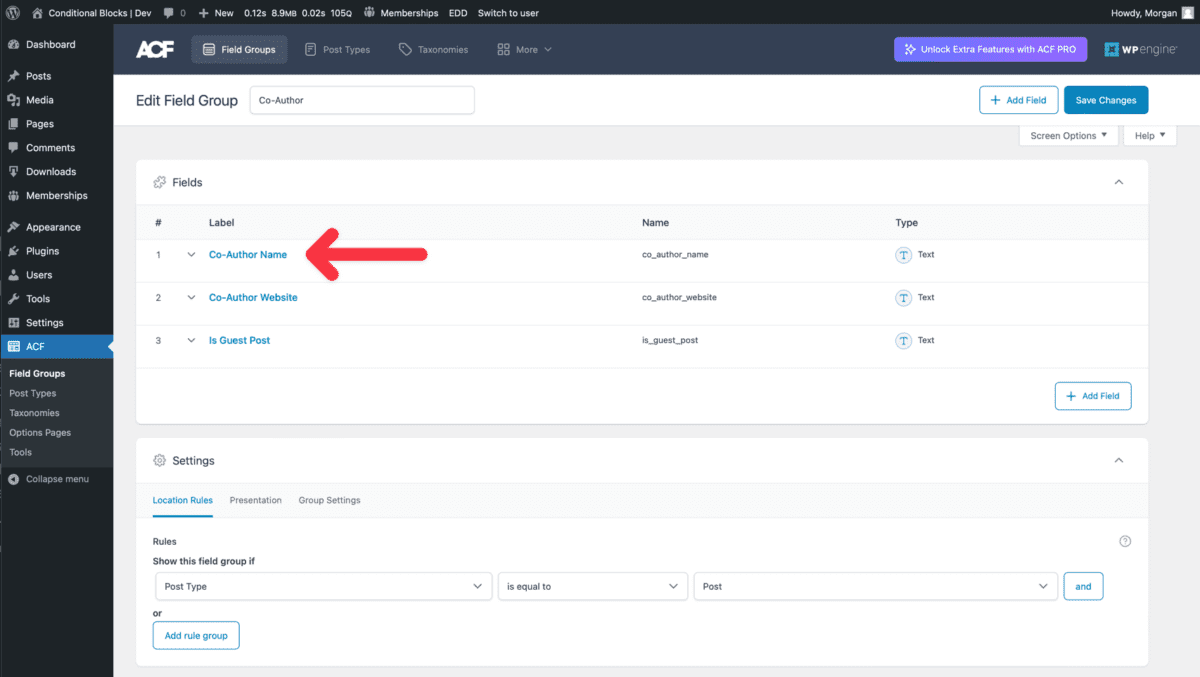
1. Creating Fields In ACF
The first step is to create a “Field Group”, this group is used to organize related field you’ll create. In our example screenshot you’ll see a Field Group called “Co-Author” with multiple fields, such as the co-authors name and website.
The idea is that you’ll be able to mark if a post is written by a co-author on each post within WordPress. You should replace the “Co-Author” examples with your own use case.
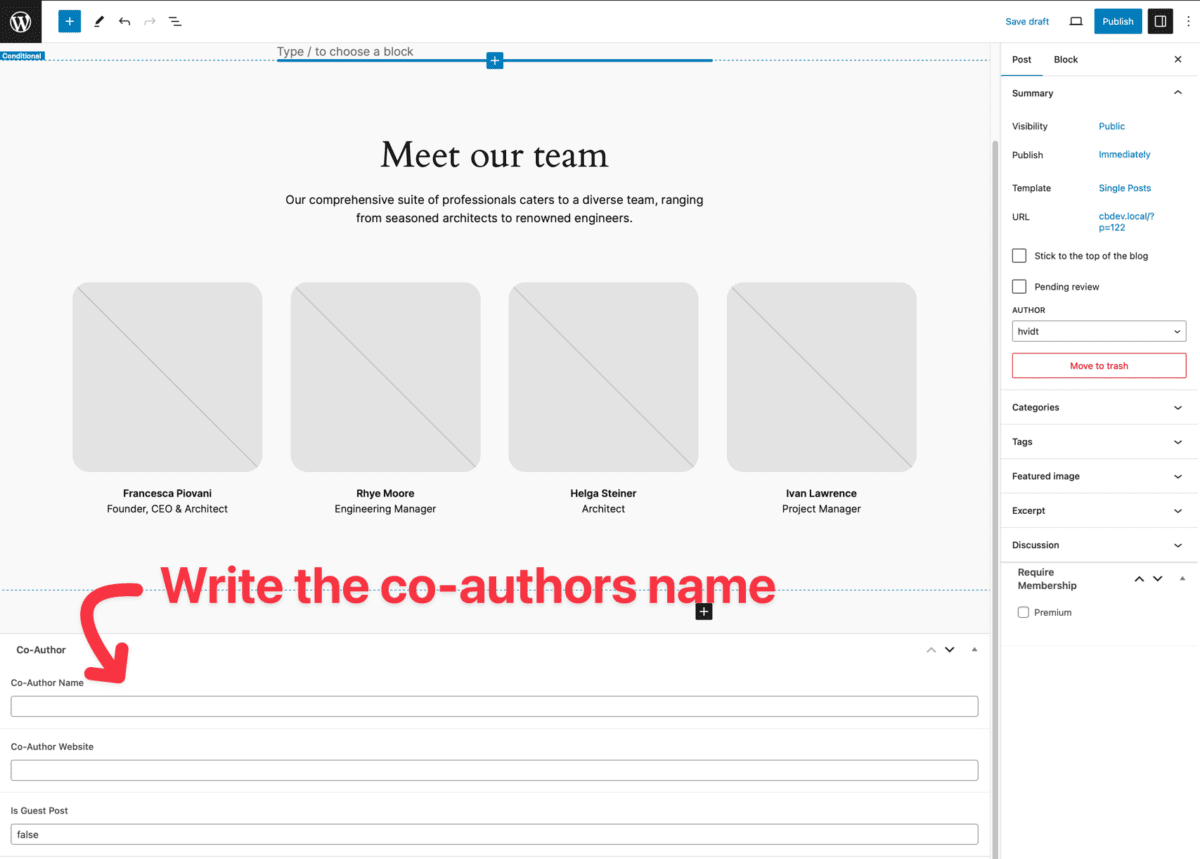
2. Setting the field values in a WordPress post.
Open up the editor for a post within WordPress, then scroll to the bottom. You’ll notice the fields we’ve just added in ACF. You’ll be able to set the values here on a per post basis. So, if this post was co-authored we’d add their name here. Write any value or name like “Morgan”.
Great! Now you’ve set up a value of the field, let’s move on controlling the visibility of content based on if they ACF fields are set on the post.
3. Changing the visibility of content with ACF value
You can now create content which you want to dynamically display. In our example we are using a Block Pattern design and apply the ACF condition to the whole group.
Here’s the steps you need to follow within the WordPress editor.
- Create block or design,This could be a group block or even a synced pattern.
- Click on your new blocks and navigate to the Conditional Blocks in the sidebar, then click Edit Visibility.
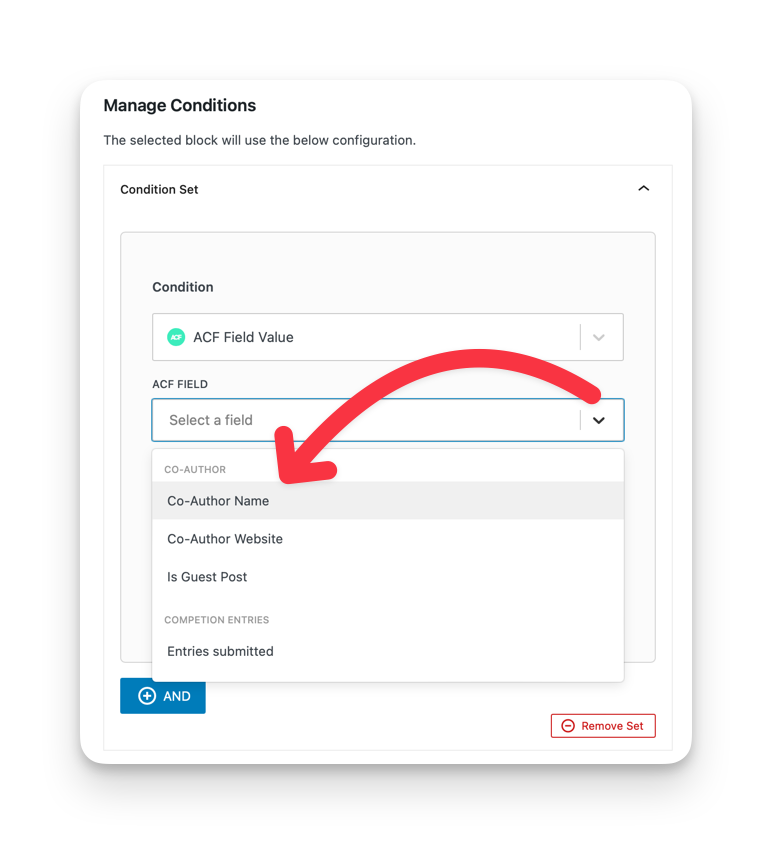
- In the available conditions list, you’ll select the condition “ACF Field Value”.
Once added you’ll see the option to select one of the registered ACF fields from earlier.
(All ACF groups and fields are displayed automatically) - Select the desired ACF field, we’ll pick “Co-Author Name”.
- Set Operator (This configures the way the value is checked)
- Set the expected value.
- Preview post to make sure the block content is displayed on your site correctly.
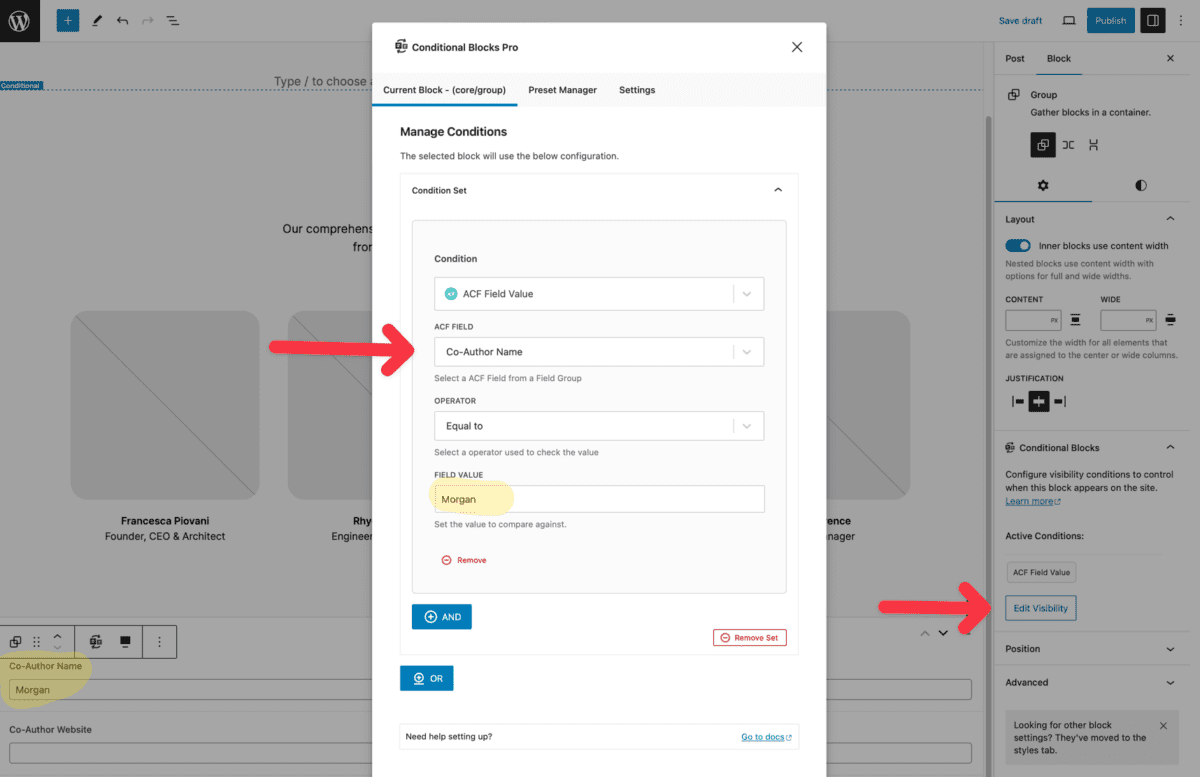
In our example we’ll setup the example like this in plain English:
If the Co-Authors name is equal to “Morgan”, then show the block content. Otherwise hide it.
Frequently asked questions
Which ACF Fields Types are supported?
Any meta values which output text, or arrays, such as text, select, checkboxes and so on.
Array values will be flattened during the check, so you could use the contains operator to check for specific values.
- Standard Fields
- Checkboxes
- Array
- Repeater Fields
- Groups
Advanced fields such as Post Objects are not supported yet. If you require advanced field types please let us know via support. Remember to include your full use-case and setup, so we can replicate it.
Which value operators are available?
You can select one of these from these operators to check the value of a field.
- Has any value (true)
- Has no value (false)
- Not equal to
- Contains
- Does not contain
- Greater than
- Less than
- Greater than or equal to
- Less than or equal to
Does this work with other custom field plugins?
No, the Advanced Custom Fields plugin integration uses the native ACF functions such as get_field_object. Therefore this condition is only for ACF data, and all ACF fields are automaticlly detected for you.
However, we do have another condition called Post Meta (custom fields). The Post Meta condition is designed to work with all custom fields within WordPress, the only downside is you’ll need to know the keys of each field.