The Meta Box plugin integration with Conditional Blocks allows you to control the visibility of WordPress content blocks based on the values of Meta Box fields. This powerful feature enables you to create dynamic, conditional content that responds to user input or custom fields within your WordPress site.
Requirements
- Meta Box plugin installed in WordPress
- Conditional Blocks Pro installed in WordPress
How to Control Block Visibility Based on a Meta Box Field
Using Meta Box fields to manage the visibility of blocks in the WordPress Block Editor is straightforward. This guide will walk you through the process of setting up Meta Box fields and using them to control block visibility.
1. Creating Fields in Meta Box
Firstly, you need to register your custom fields within Meta Box. There’s two ways you can do it:
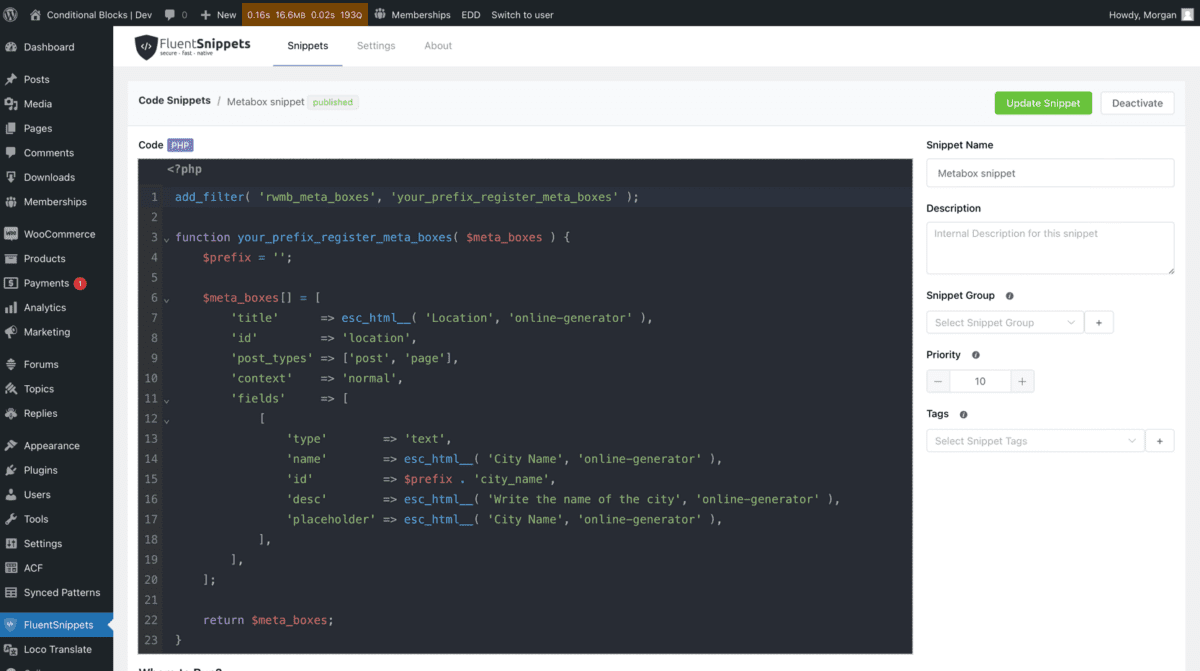
- Using the free online code generator by Meta Box – Generates code snippets (which we’ve done)
- Using the paid Meta Box Builder. Drag and drop fields with no code.
Our example code generates a field group called “Location” and a meta field for the “City Name“. These fields which will apear on pages and posts. You can of course be more creative and use custom post types.
Below you’ll see our example snippet running in WordPress. If you choose to use the Meta Box builder you don’t have to run a snippet.
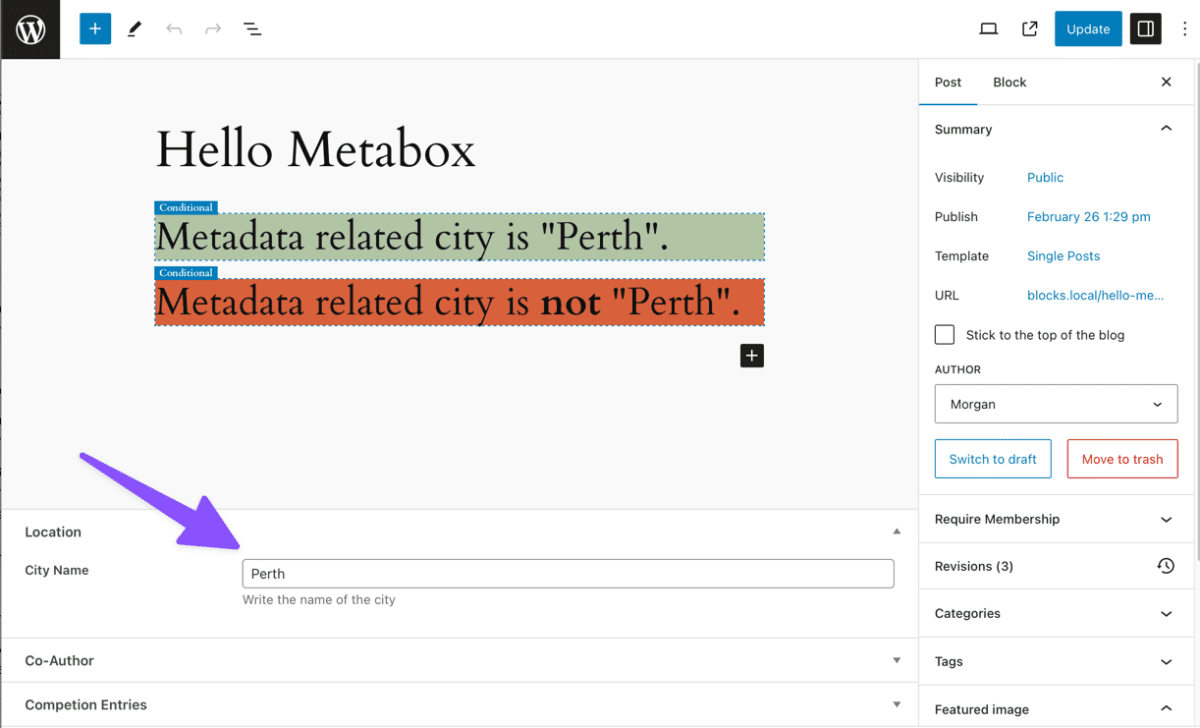
2. Setting the Field Values in a WordPress Post
When editing a post in WordPress, scroll down to the Meta Box fields section and set the values for each field. For instance, if you’re adding event details, you would input the date, location, and organizer’s name.
3. Changing the Visibility of Content with Meta Box Value
After setting up your fields and inputting values, you can control the visibility of blocks in your post:
- Create a block or design pattern in the WordPress editor.
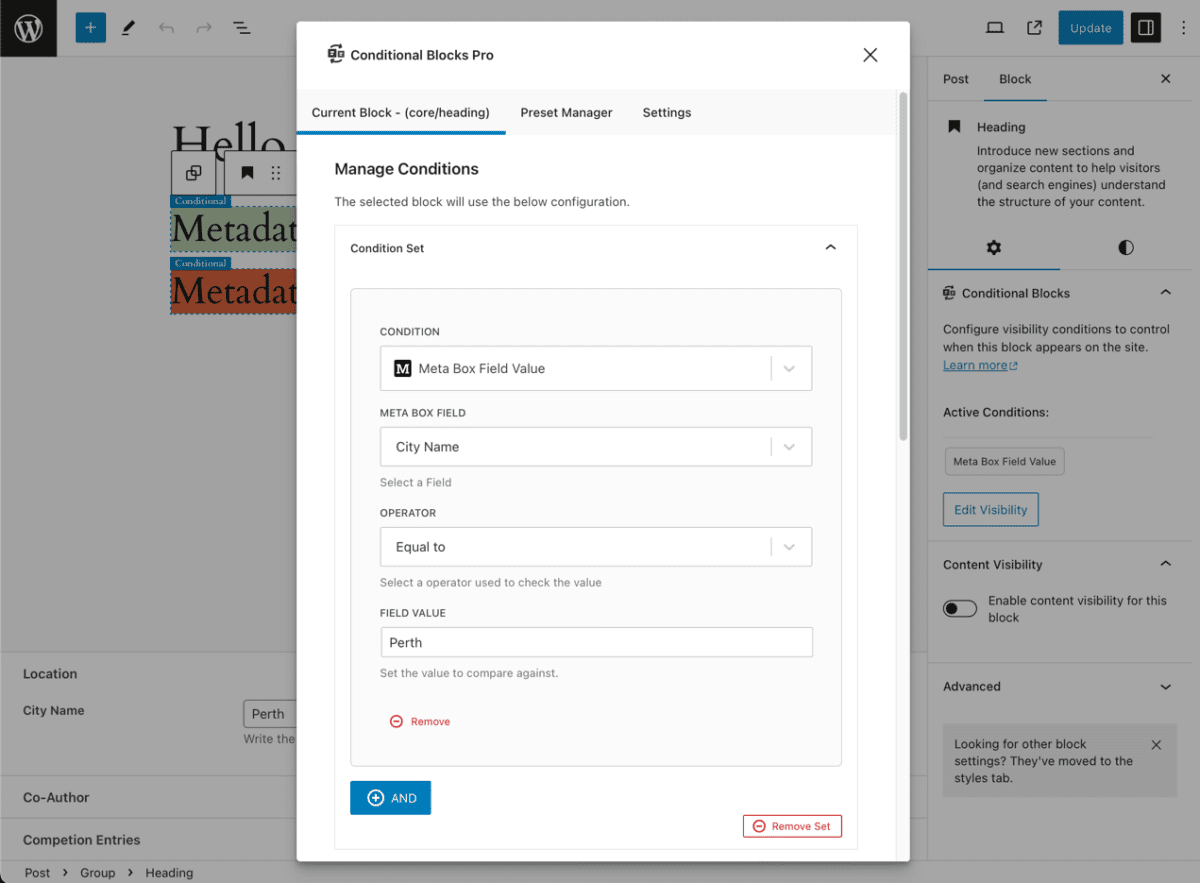
- Click on the block and navigate to the Conditional Blocks section in the sidebar, then click Edit Visibility.
- In the conditions list, select “Meta Box Field Value“.
- Choose the Meta Box field you want to use for the condition.
- Set the operator to define how the field value will be checked.
- Enter the expected value for the field.
- Preview the post to ensure the block content displays correctly based on the condition.
For example, we are displaying a block if the post meta city_name equals Perth or not.
This is a very simplistc example of using meta data. However, you can be as creative as you’d like. The common use-cases for meta data is to create custom post types, and use custom templates to fit your data.
You can use Conditional Blocks on Full Site Editing template parts, or re-useable blocks as well.
Frequently Asked Questions
Which Value Operators Are Available?
The following operators are available to check the value of a Meta Box field:
- Has any value (not_empty)
- No value (empty)
- Equal to (equal)
- Not equal to (not_equal)
- Contains (contains)
- Does not contain (not_contains)
- Greater than (greater_than)
- Less than (less_than)
- Greater than or equal to (greater_than_or_equal_to)
- Less than or equal to (less_than_or_equal_to)
Which fields types are supported?
Any meta values which output text, or arrays, such as text, select, checkboxes and so on.
Array values will be flattened during the check, so you could use the contains operator to check for specific values.
Advanced fields such containing Objects are not supported yet. If you require advanced field types please let us know via support. Remember to include your full use-case and setup, so we can replicate it.
Does This Work with Other Custom Field Plugins?
The Meta Box integration is specifically designed to work with the Meta Box plugin using its native functions, such as rwmb_meta(). However, Conditional Blocks also offers a “Post Meta (custom fields)” condition that can work with custom fields from other plugins, provided you know the field keys.
By following these steps, you can leverage the Meta Box plugin’s custom fields to create dynamic, conditional content in your WordPress site using Conditional Blocks Pro.